Creating an eCommerce website doesn’t have to be complicated or confusing. It’s just about selecting the right tools and following the right process so your journey is not overly complex.
eComStrive has created this tutorial to teach you how to choose a web hosting provider and set up your web server with WordPress.
We highly recommend Cloudways because of their fantastic service, monthly pricing based on the resources you use, and user-friendly interface. Avoid getting lost within the confusing pages cPanel or Plesk by choosing Cloudways instead. We’ll start with Cloudways’ free 3-day trial, so you can ensure you enjoy the web hosting product and that it suits your needs before committing to a monthly payment.
Once you create your Cloudways account, we’ll walk you through how to install WordPress. But you won’t believe how easy it is. With just a couple of clicks, you’ll have WordPress installed, and your server deployed. You’ll then associate your Cloudways server with your domain name purchased in the last tutorial.
You’ll learn how to access your WordPress admin dashboard, so you start the WordPress setup process. Add a web page, choose WordPress themes, and look through plugins. It’s an exciting journey, and we’re here to take you through every step to your finished eCommerce website so you can start making sales!
What Is WordPress? #
WordPress is the world’s most popular application for building custom websites and blogs, powering 42.4% of all websites on the internet. WordPress’s market share is significantly more than Shopify, Joomla, Wix, Squarespace, and Drupal. WordPress powers nearly 50% of all websites you visit on the internet.

At its core, WordPress is an open-source content management system (CMS) software for creating, modifying, and managing content online. You can add images, videos, articles, blog posts, pages, products, and more. And the content management system isn’t hidden behind complex coding requirements. WordPress is very user-friendly, so even if you have no experience creating a website or using a CMS, it’s super easy to pick up WordPress.
Why Is WordPress So Popular? #
In recent years, several WordPress alternatives have cropped up. Many of these competitors, like Wix, Squarespace, Domain.com, and Drupal, have spent millions on flashy marketing campaigns. In 2016, Squarespace spent $79 million in advertising. While these website builders are rapidly growing, they haven’t made significant inroads into WordPress’s market share.
WordPress is more appealing for individuals, brands, small businesses, and large enterprises looking to build a website for a few key reasons:
- Free – you can download and install the WordPress software on your website at no cost. WordPress reduces the financial barriers that often keep people from creating a high-quality custom website.
- Open-Source – WordPress’s source code is open-source, meaning anyone can use, edit, or modify the codebase for their own purposes. Thanks to its open-source roots, WordPress has developed a massive community of creators, users, and developers.
- Blogging – WordPress got its start as a blogging platform because it’s so simple to create a beautiful blog where writers can publish content, schedule posts, host guest contributors, and work with editors. WordPress created an accessible blogging platform that required no coding experience.
- Plugins – WordPress plugins are at the heart of WordPress’s success. Plugins allow website creators to add new functionality to their sites without knowing any coding. If you can dream it up, someone has already created a plugin for it, whether that’s a contact form or an SEO tool. There are thousands of Free plugins to choose from, but Paid plugins are sometimes a wise investment because of the premium features!
- SEO – Website builders like Wix and Squarespace really struggle on the SEO front because their backends are clunky and not optimized. WordPress, however, is fantastic for websites if you want to prioritize your SEO. WordPress makes it easy to add hyperlinks, create alt text for your media, and manage metadata. And you can choose from top-rated SEO plugins like SEO by Yoast or All-in-One SEO.
- Database – All WordPress sites include a WordPress database for storing content. WordPress uses a database management system called MySQL. Your MySQL database stores your website’s content, images, videos, users, and more. MySQL is extremely popular. Top companies like Facebook and Twitter choose it because it’s secure and highly optimized.
- Ecommerce – WordPress integrates wonderfully with great eCommerce plugins like WooCommerce so you can create powerful websites for selling all manner of products. With WordPress you can set up your cart, checkout, and other eCommerce features to your exact preferences.
- Themes – there’s no need to know how to code a website from scratch with WordPress. There are literally thousands and thousands of available themes on the internet, that are compatible with WordPress. You can find free themes or purchase a premium pre-made theme that will include extra features. You can even hire a theme developer to create a unique theme just for your eCommerce site.
What Kinds Of Websites Can You Make With WordPress? #
We already mentioned that WordPress was primarily a blogging platform when it launched in 2003. But WordPress has been transforming and changing over the last almost 20 years. WordPress moved to expand from its blogging origins years ago, making changes to its source code to offer users more options. Now you can create and customize any kind of website.
With WordPress, you aren’t limited to any specific ‘type’ of website. Whatever you can imagine, you can create. This includes complex and scalable eCommerce sites. We’ve compiled a list of the most popular types of websites built using WordPress, including some example themes:
1. eCommerce Websites #
Whether you’re starting small or already have a large existing eCommerce storefront using another platform, WordPress can help you create the eCommerce store of your dreams!

2. Blogs #
If you like to write content and share it with the world, WordPress is the place to be. Join a large community of professional bloggers and hobby bloggers covering topics ranging from lifestyle blogs to mommy content to cooking and recipes, money and financial advice, career advice, cars and automotive, and everything in between!
3. Portfolios #
Anyone working in a creative industry or role, from web developers to artists, graphic designers, and freelancers, can benefit from showcasing their talents with an online portfolio website. WordPress makes it easy to display your work so potential clients or employers understand who you are, what your skillset is, and what kind of previous work you’ve created.

4. Business Websites #
Any business of any size can create an official business website where they generate new leads, provide information about the company and its mission, and build its online presence. A business website is essential in today’s world.
5. Forums #
Want to create a thriving forum and community around a certain topic or passion? You can do that with WordPress. There are a number of WordPress forum plugins to help you get started.
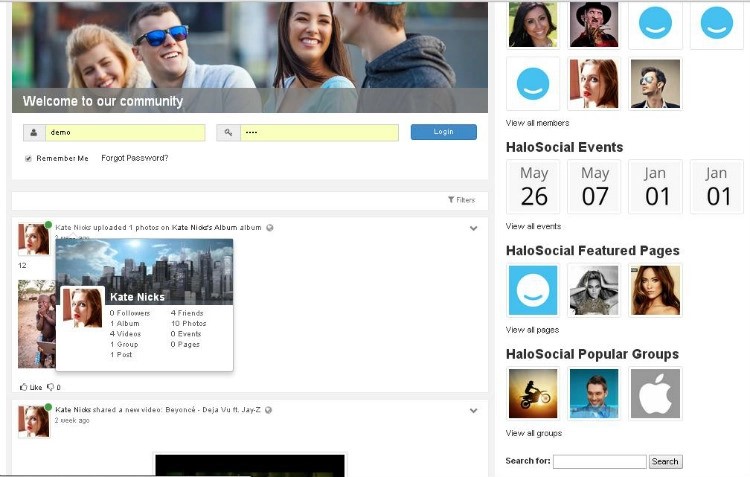
6. Social Networks #
With WordPress, you can create all the components needed for a new social networking website. Select plugins like BuddyPress or HaloSocial to start adding functionality for user authentication, groups, profiles, user feeds, messaging, and much more.
7. Wiki/Knowledgebase #
You can also use WordPress to create a wiki website or knowledgebase for something you are knowledgeable and passionate about. You can even crowdsource information by adding the capability for multiple guest contributors.
Things You Need Before Installing WordPress #
While it’s super easy to get started with WordPress, there are a few things you need to address first. You will need to register a domain name and choose a web hosting company that works well with WordPress. Once you have that squared away, you can install WordPress onto your website.
Domain name #
A domain name is a unique but easy-to-remember web address that visitors use to access your site. When you enter a domain name into a browser’s address bar, like www.google.com, the domain communicates with a DNS server. The DNS server sends back an IP address, so your computer knows the actual address to access.

We use domain names because it’s easier for our brains to remember combinations of words or phrases than a 10-digit number. Can you imagine if you needed to remember every unique IP number when you wanted to access a website? Plus, domain names add a layer of security to protect websites because hackers can spoof or launch other malicious attacks when they know as site’s IP address.
If you don’t have a domain name registered yet, you’ll need to brainstorm a few domain ideas that represent your brand well. Then you can use a registrar to register your chosen domain name for a set period of time (one year is good to start).
If you need help, we’ve already covered how to register a domain name in our last tutorial. We recommend Cloudflare because it is a relatively cheap solution. Cloudflare actually sells domain names at the same price they get from an accredited registry. They don’t add any extra fees or mark up the price because they make money through their other services and products. If you choose another registrar, you will end up paying more. Head on over to our domain name tutorial and follow our step-by-step instructions and come back once you’re done!
Hosting #
Websites don’t exist in some sort of imaginary cyberspace. The files and data for every single website are stored on a physical server somewhere, usually within a server farm or data center. Even the data stored on cloud servers is still stored on a physical device somewhere.
When you want to create your own website, you need to lease a bit of server space to store all your website’s data (in this case, WordPress files) and make it available for online viewing. The companies that own and manage web servers and offer leased server space are known as web hosting providers. You’ll need to enter into an agreement with a web hosting provider to host your website on the internet.
The amount of space allocated for your website and files depends on the type of hosting you choose:
- Shared Hosting – The hosting provider manages multiple websites on a single server. Each website gets its own ‘section’ of the server, but by sharing resources, the costs of web hosting are kept low.
- Dedicated – With dedicated hosting, a single website/business customer leases the entire server. A great option if your business needs better performance and security.
- VPS – A VPS or virtual private server managed by a web hosting provider is available for lease. Similar to shared hosting, except the physical device is split into multiple virtual environments that businesses can lease.
- Reseller – In reseller hosting, a mid to large-sized business has leased a decent amount of space from a web hosting company. They either don’t need it all or want to offer web hosting as part of their business’s services. The business will sell hosting space to their clients or smaller businesses and entrepreneurs to recoup some of their hosting costs.
If you are just starting out with your first custom website, shared hosting or VPS are usually your best budget-friendly options. You probably won’t need the additional services and higher level of management provided by dedicated web hosting. And reseller web hosting is a niche you don’t need to work about in most cases.
Since we’re creating a site using WordPress and the popular plugin, WooCommerce, you want to select a hosting service that can best support your eCommerce site.
Tip:
When choosing from WordPress hosting providers, be careful and read the hosting rules. The initial price may be tempting, but after the first year, the price may increase rapidly.
How To Install WordPress on Cloudways #
6 steps to install WordPrs
- Set Up Your Cloudways Account
- Configure Application and Server Details
- Application (WordPress) Management Set Up
- Set Up Cloudflare with Cloudways
- Link Your Domain Name
- Add Free SSL Certificate
Cloudways will be your best friend if you want to create a website using WordPress. Cloudways is a managed WordPress hosting solution. With Cloudways, your website data will be stored and managed in the cloud. By choosing this service, your WordPress site will run efficiently and without any lag in performance because Cloudways is optimized for the best WordPress experience.
Cloudways makes it super easy to get started. You can get your server deployed, and WordPress installed in just a few clicks. Simply select your application software, web host, and size, and you can get it deployed within minutes.
Tip
We really like Cloudways because they charge monthly, and you only pay for the services and data storage that you use. Most other competitors charge by the year. And if, at some point, your traffic dramatically increases, Cloudways has options for easily scaling your site.
1. Set Up Your Cloudways Account #
1. Visit the Cloudways website at www.cloudways.com/en/ and click on the green Start Free button in the hero section.

Or head straight to the sign-up form and fill in all the necessary personal information. Answer the three questions to the best of your ability, but don’t worry; it has no bearing on your services or account. They are just there so Cloudways can learn more about you, to better serve your needs. Click Start Free to create your account.
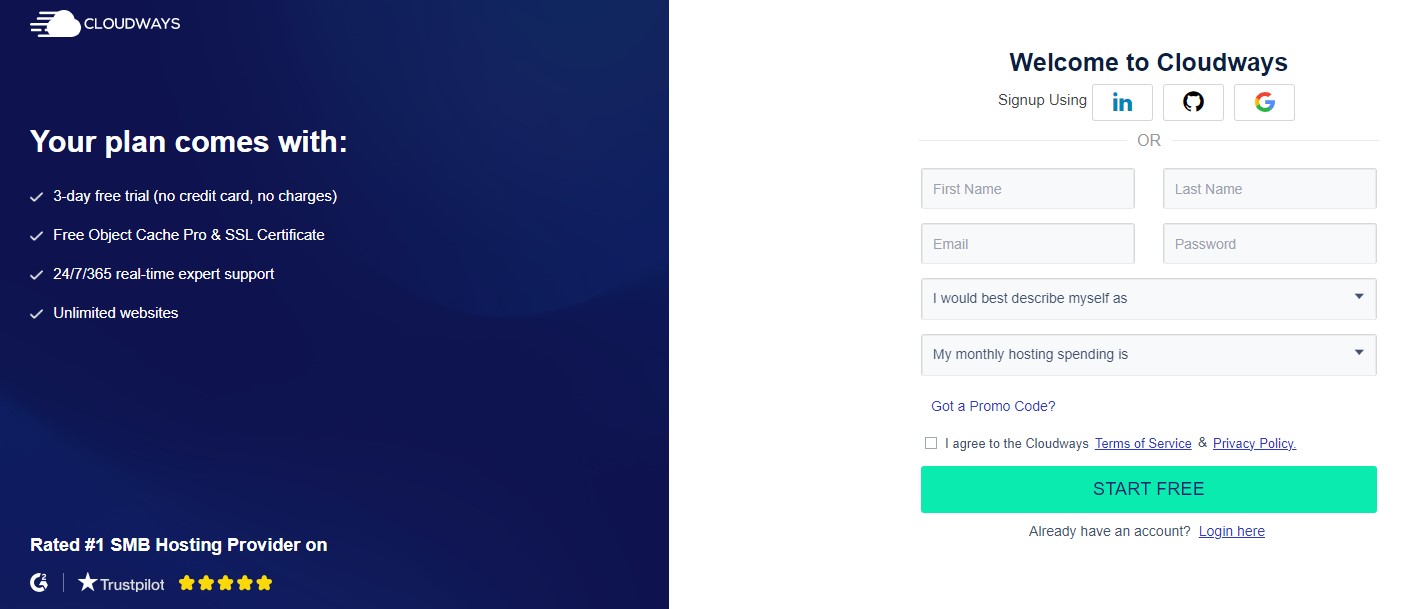
Tip:
You will be started on a 3-day free trial. This gives you time to set up your account and test if this hosting provider is right for you before you commit and start paying for the hosting service.
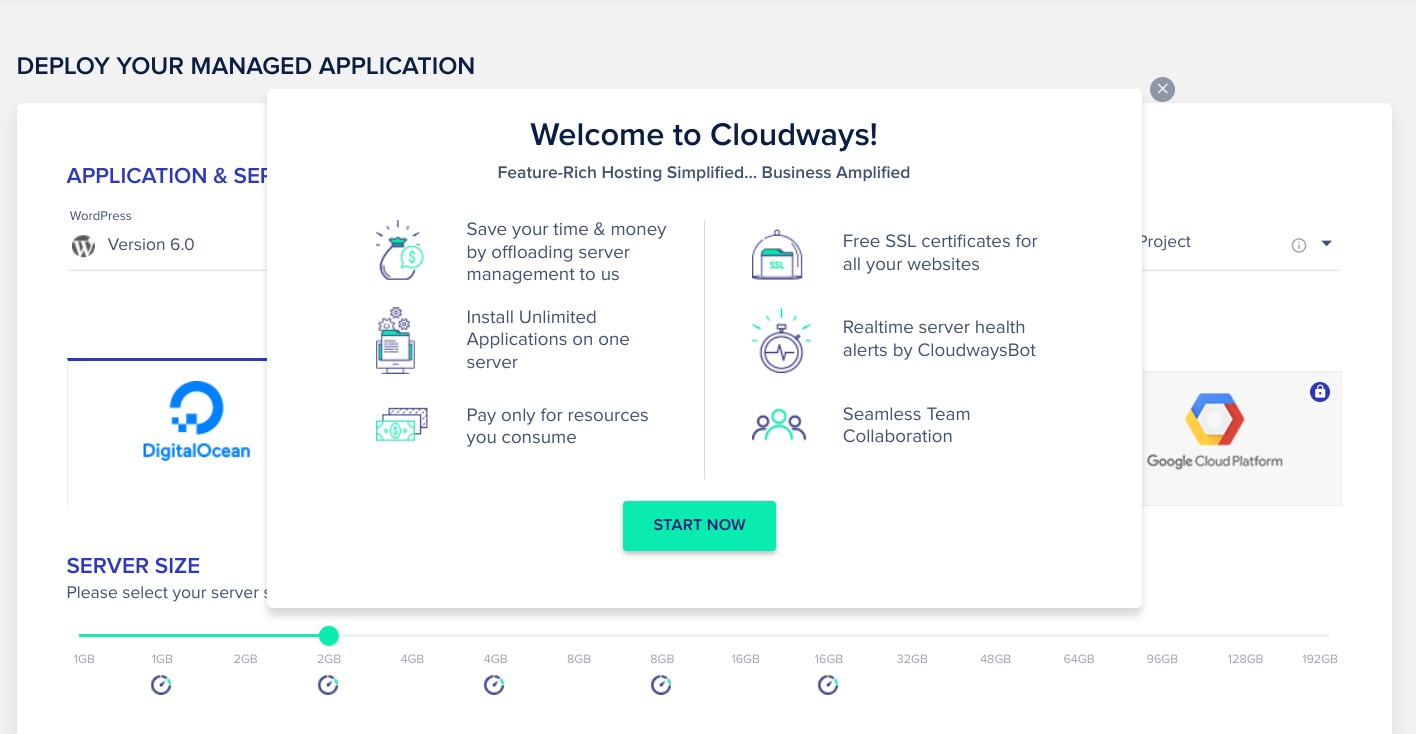
2. Once you have created your hosting account on Cloudways, you can choose your server and install WordPress. When you first log in to your Cloudways account, you are greeted with a Welcome to Cloudways message.
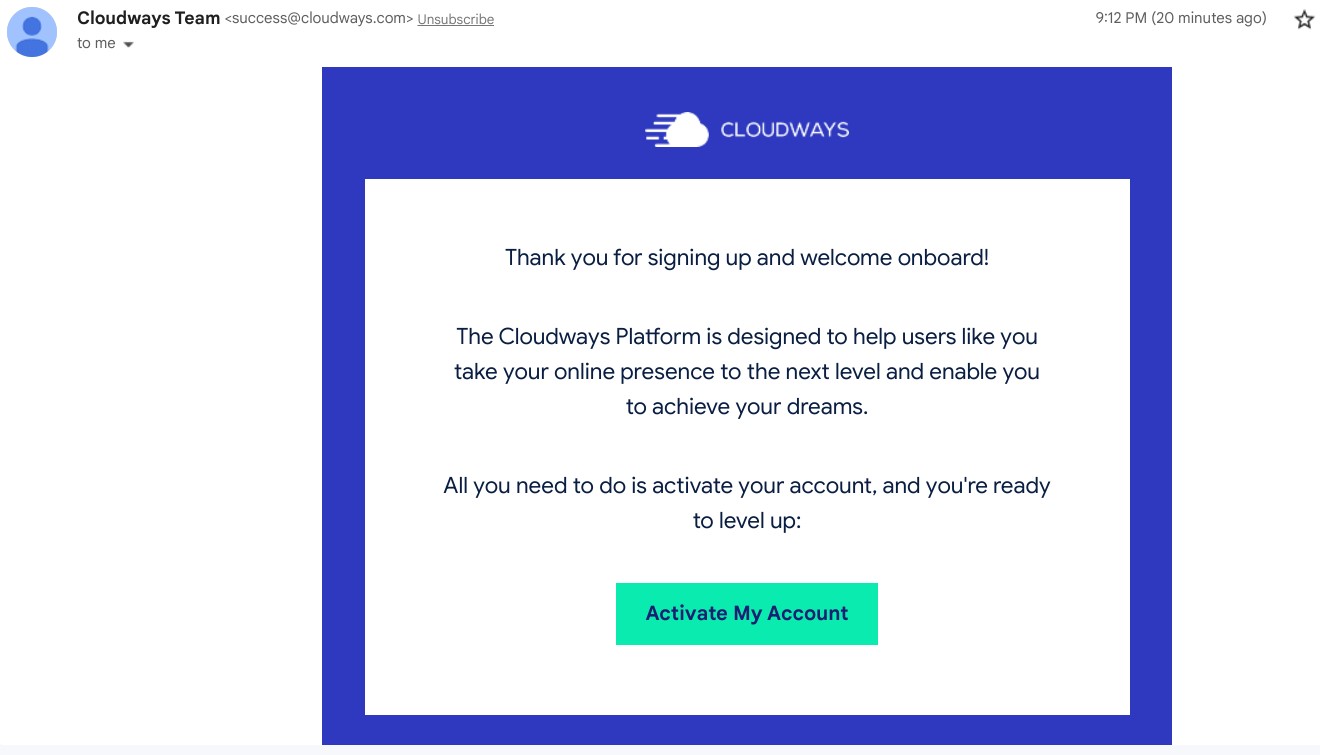
3. But before choosing a server, your email address must be verified. Head to your email provider and look for an email from the Cloudways Team titled Let’s activate your Cloudways account.

Open this email and click Activate My Account. You will be redirected back to Cloudways.
2. Configure Application & Server Details #
Notice you are now on the Application & Server Details page, where you will be:
- Choosing your application software – from Cloudway’s list of applications that can be installed onto your server (like WordPress and WooCommerce)
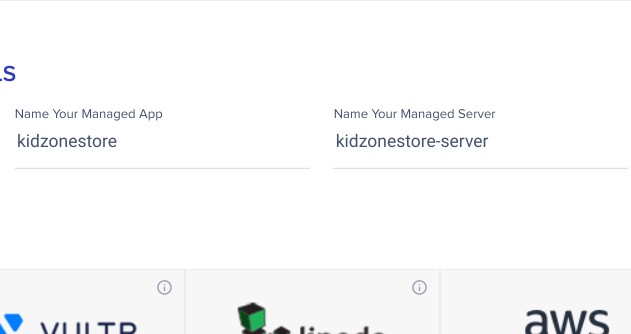
- Naming your app, managed server, and project – name your app, server, and project something you will remember, so you can differentiate easily from any later sites.
- Choosing your cloud provider – from a list of 5 reputable cloud providers (DigitalOcean, Vultr, Linode, AWS, or Google Cloud Platform) that will host your site on their servers.
- Selecting your server size – how much server capacity (1GB, 4GB, 32GB, etc) you want to be reserved for your site and its files. You can scale this up or down at any time.
- Selecting your server location – which city (London, New York, etc) do you want your website to be hosted from (that’s where the server will be located)? Choose the closest location to your customers for the best results.
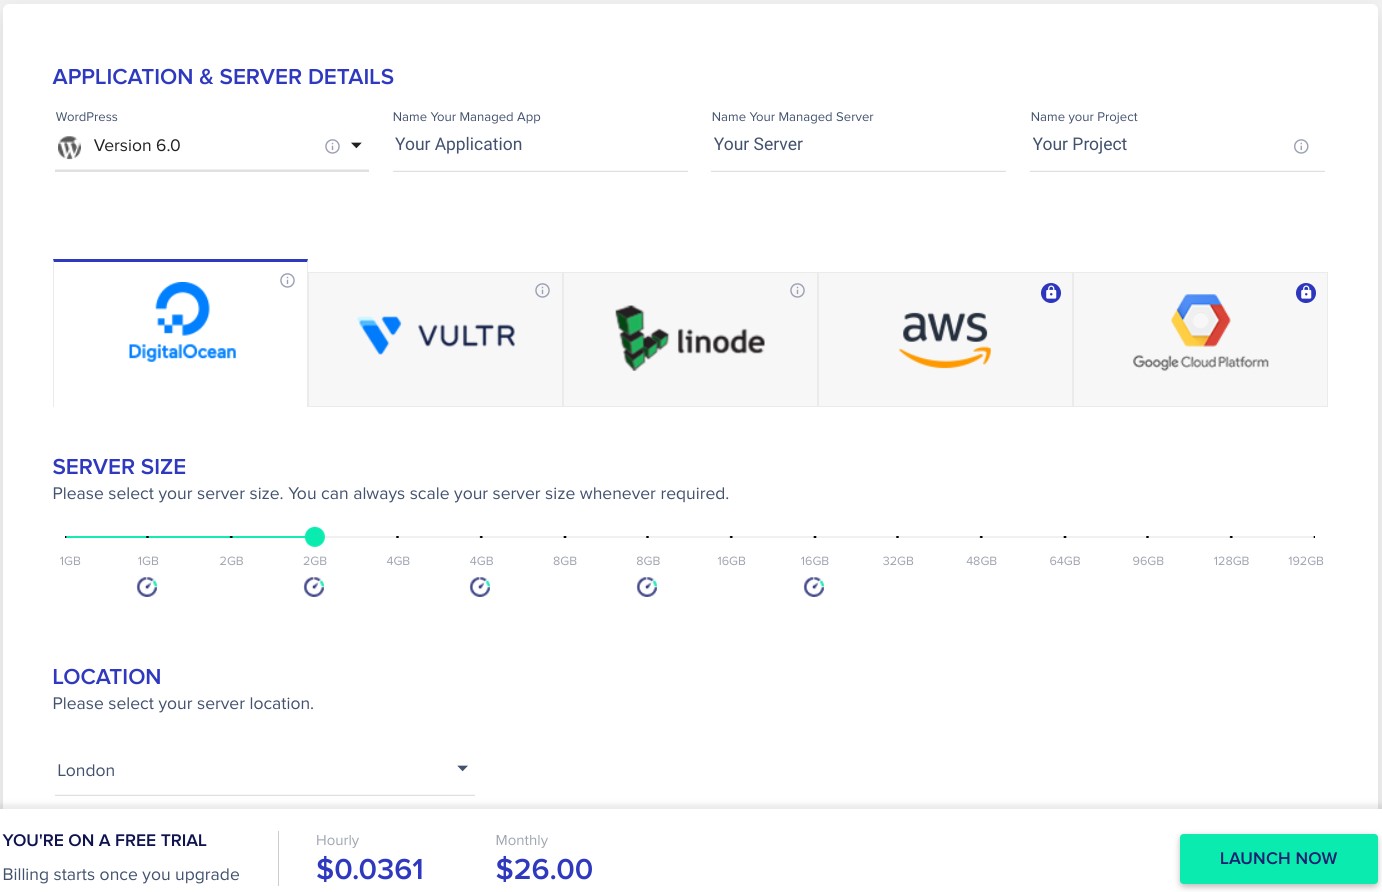
4. Start by expanding the first drop-down menu for the server software.
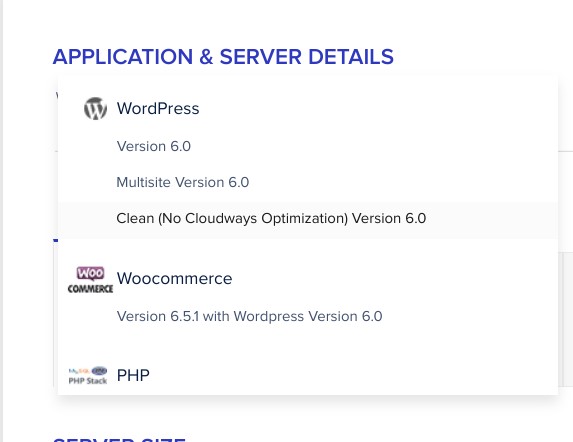
You want to set it to WordPress (in this case, Version 6.0). You might notice you can select WooCommerce directly from here. But we are going to hold off on that because we want to show you in a later tutorial how to do that step-by-step.
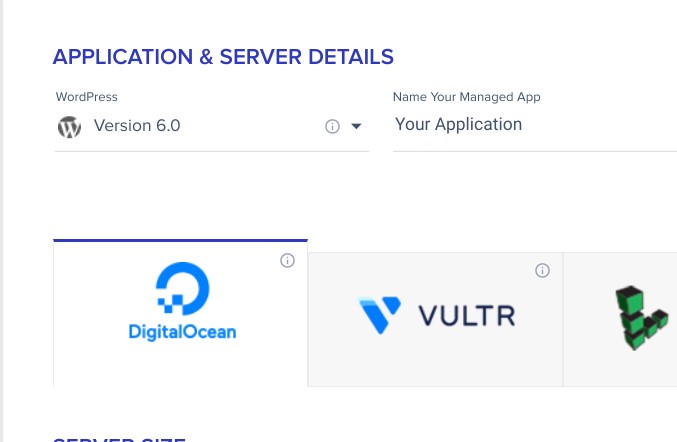
5. Next, you can name your application and server with any desired name. Enter your choices into the Name Your Managed App and Name Your Managed Server fields.
6. Now, you’ll choose your cloud hosting provider from five options. DigitalOcean, Vultr, and Linode are available during the free trial, but AWS and Google Cloud Platform are only for paid accounts. Click on your provider of choice before moving on to the next step.

Tip:
All five cloud hosting servers to choose from are high-quality, stable, and secure options. But we suggest DigitalOcean or Vultr.
7. Use the slider to select your Server Size. Always allocate at least 1 GB.

8. Choose a Location for your server. This is the geographic city where the physical computer (server) is within a data center. For example, if you select London, your website is hosted on a server located in a London data center.

Tip:
Choose whichever server location you feel is nearer to the country from where most of your traffic is expected to originate. For example, if you are running a local business, choose a server location nearest to your country.
9. When you’ve filled in all the fields, you can click Launch Now to start deploying your server. But make a note of the Hourly and Monthly costs associated with the choices you’ve made. Once the 3-day trial is over, this is the monthly cost you will pay.
For example, if you select a larger server size, you will pay more. If you choose a premium cloud hosting server from AWS or Google Cloud Platform, you will pay more.
You can scale your server up or down as needed in the future.

Tip:
Your server has been successfully deployed, so you can officially start playing around with it. You can manage your server by clicking on the vertical ellipsis (⋮) icon.
3. Application (WordPress) Management Set Up #
Your server may take a few minutes for Cloudways to set up and deploy, but once that’s complete, you can start managing WordPress.
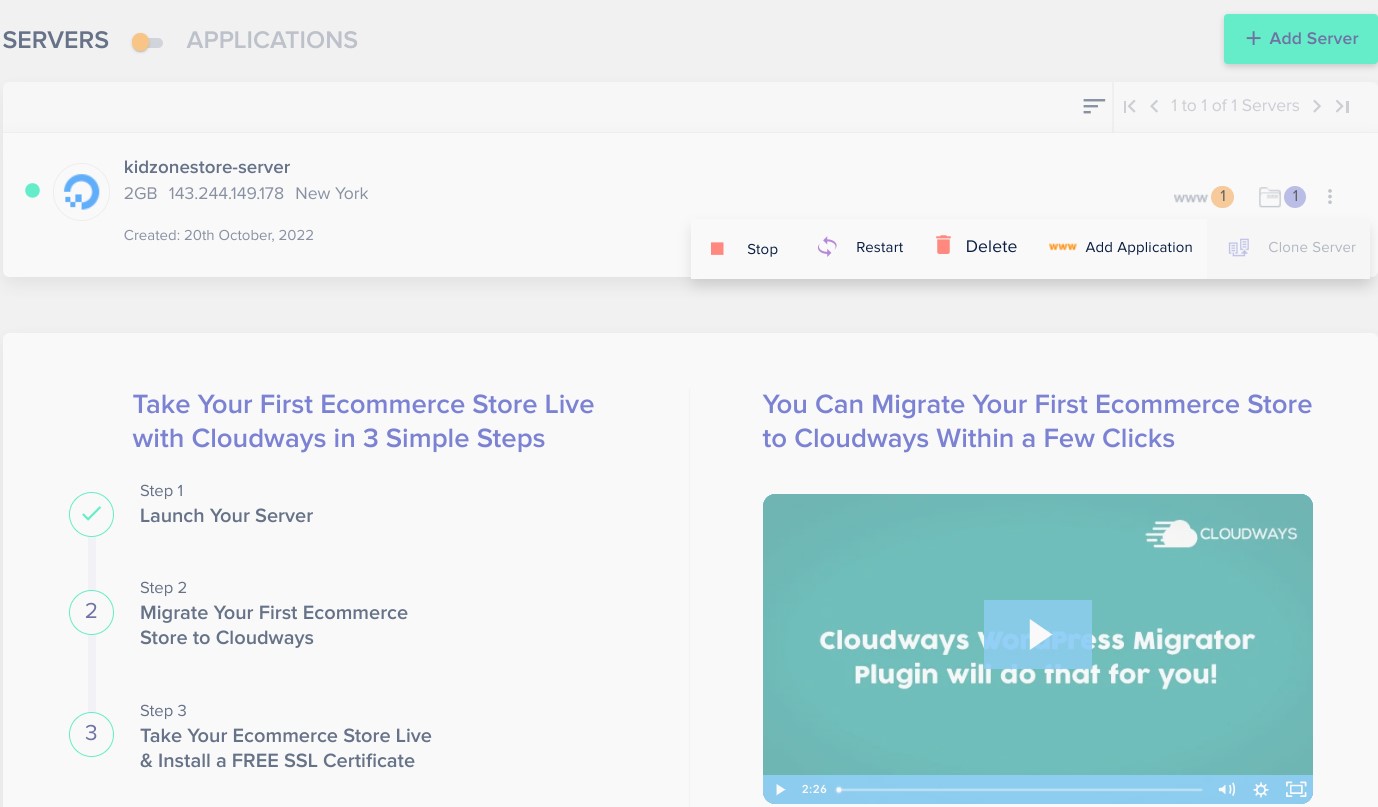
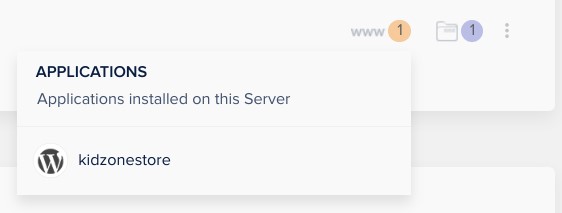
10. Click on the www symbol with the (1).

From the popout menu, select the Application that you created earlier. In our case, it’s kidzonestore.
11. This will bring up the Application Management screen. From here, you can control every detail and configure your newly installed application.
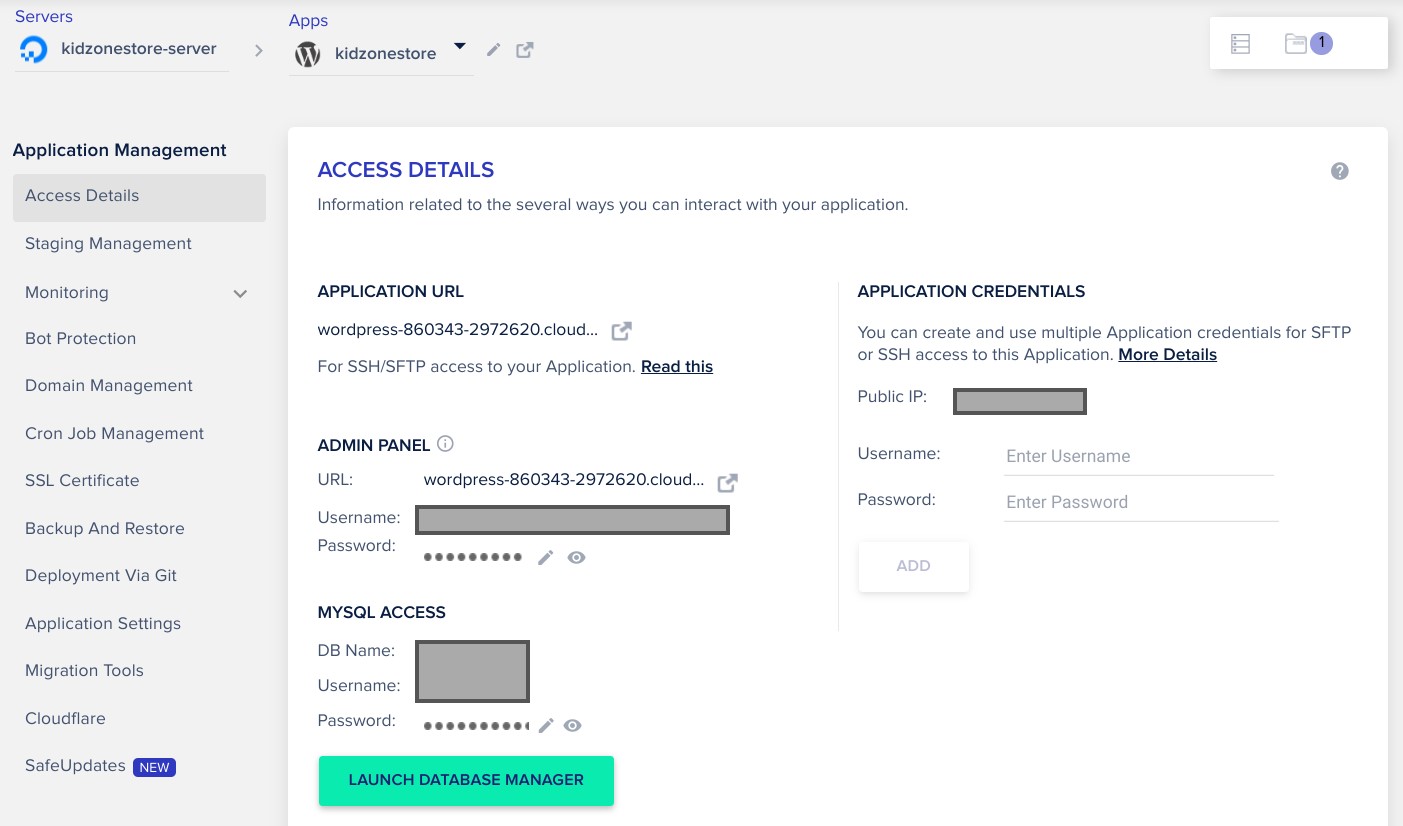
From the Access Details tab, find the Admin Panel heading. Launch your newly installed WordPress site by clicking on the URL. When you click on the box and arrow next to the URL (in our example, it’s the wordpress-8600343-2972620.cloud… address), WordPress will open in another window.

Notice your WordPress admin username and password are located on this page. Your database user information and MySQL password are also displayed. You must first enter your WordPress credentials before you are granted access. Hover over the Username and click when it says Click to copy. Paste this into the WordPress login page in the new tab. Repeat for the Password.
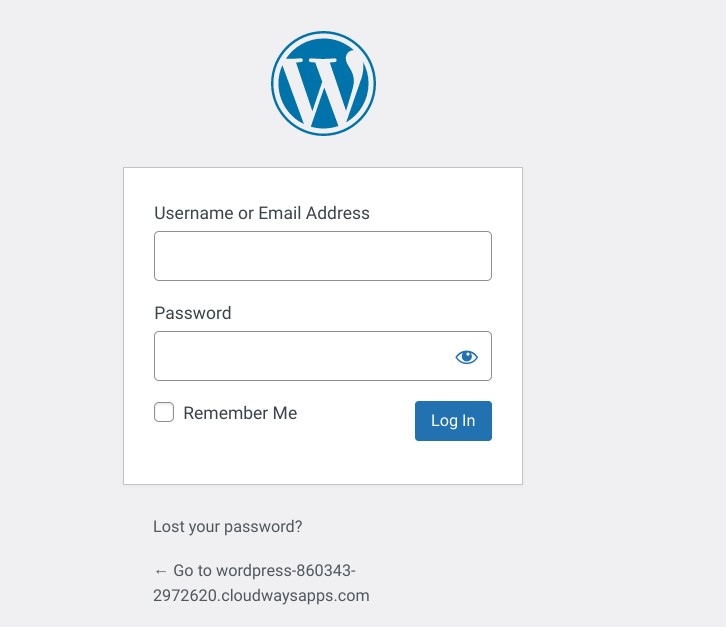
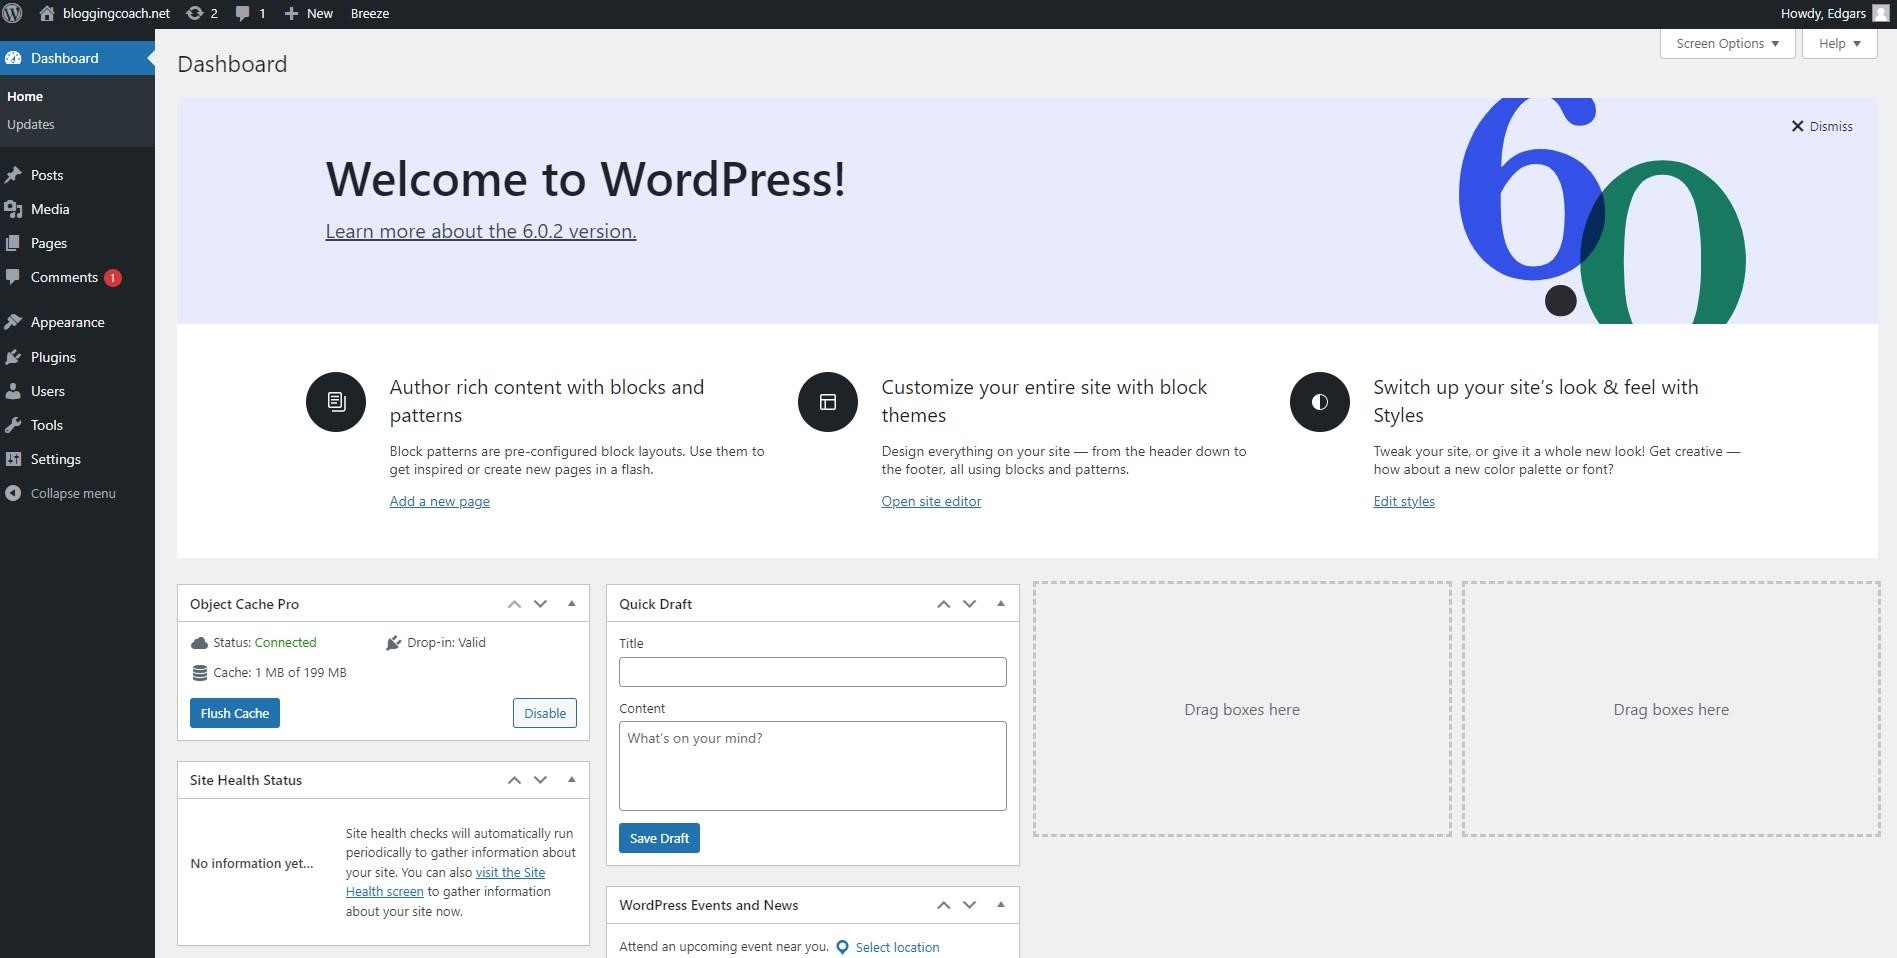
12. Once your WordPress credentials are verified, you are now on the WordPress dashboard. As we move through future tutorials, you will become intimately familiar with this dashboard.
Tip:
Cloudways assigns your website a random address. If you haven’t already, you’ll need to get a domain name before you can move on with the rest of the tutorial. We suggest Cloudflare because of its ease and security. You can read more about purchasing a domain name here.
4. Set up Cloudflare with Cloudways #
In this section, we will help you associate your purchased Cloudflare domain with your Cloudways server/hosting account. The steps we outline below are specifically for Cloudflare domain names. If you went with a different registrar, then you’ll need to follow another how-to article on setting up your domain name with Cloudways. If that’s the case, you can skip to the next section.
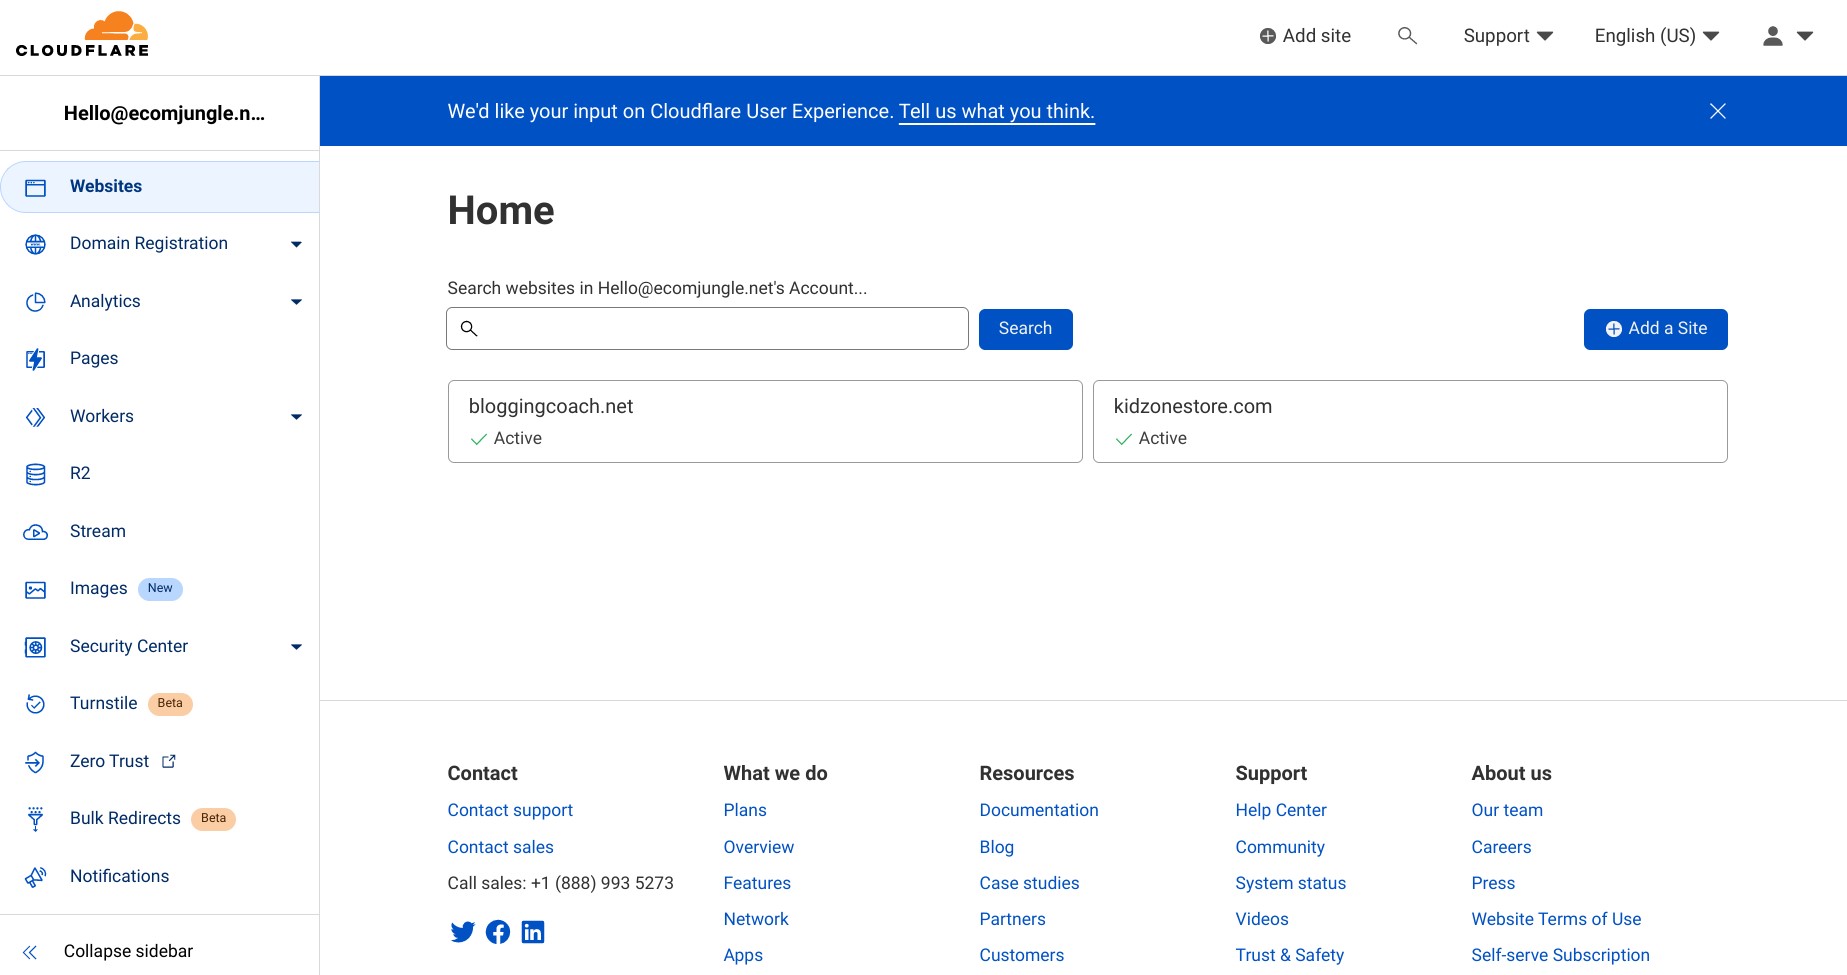
13. Navigate to Cloudflare and enter your account information to log back into your dashboard. Select the domain name you want to link with your Cloudways WordPress site.
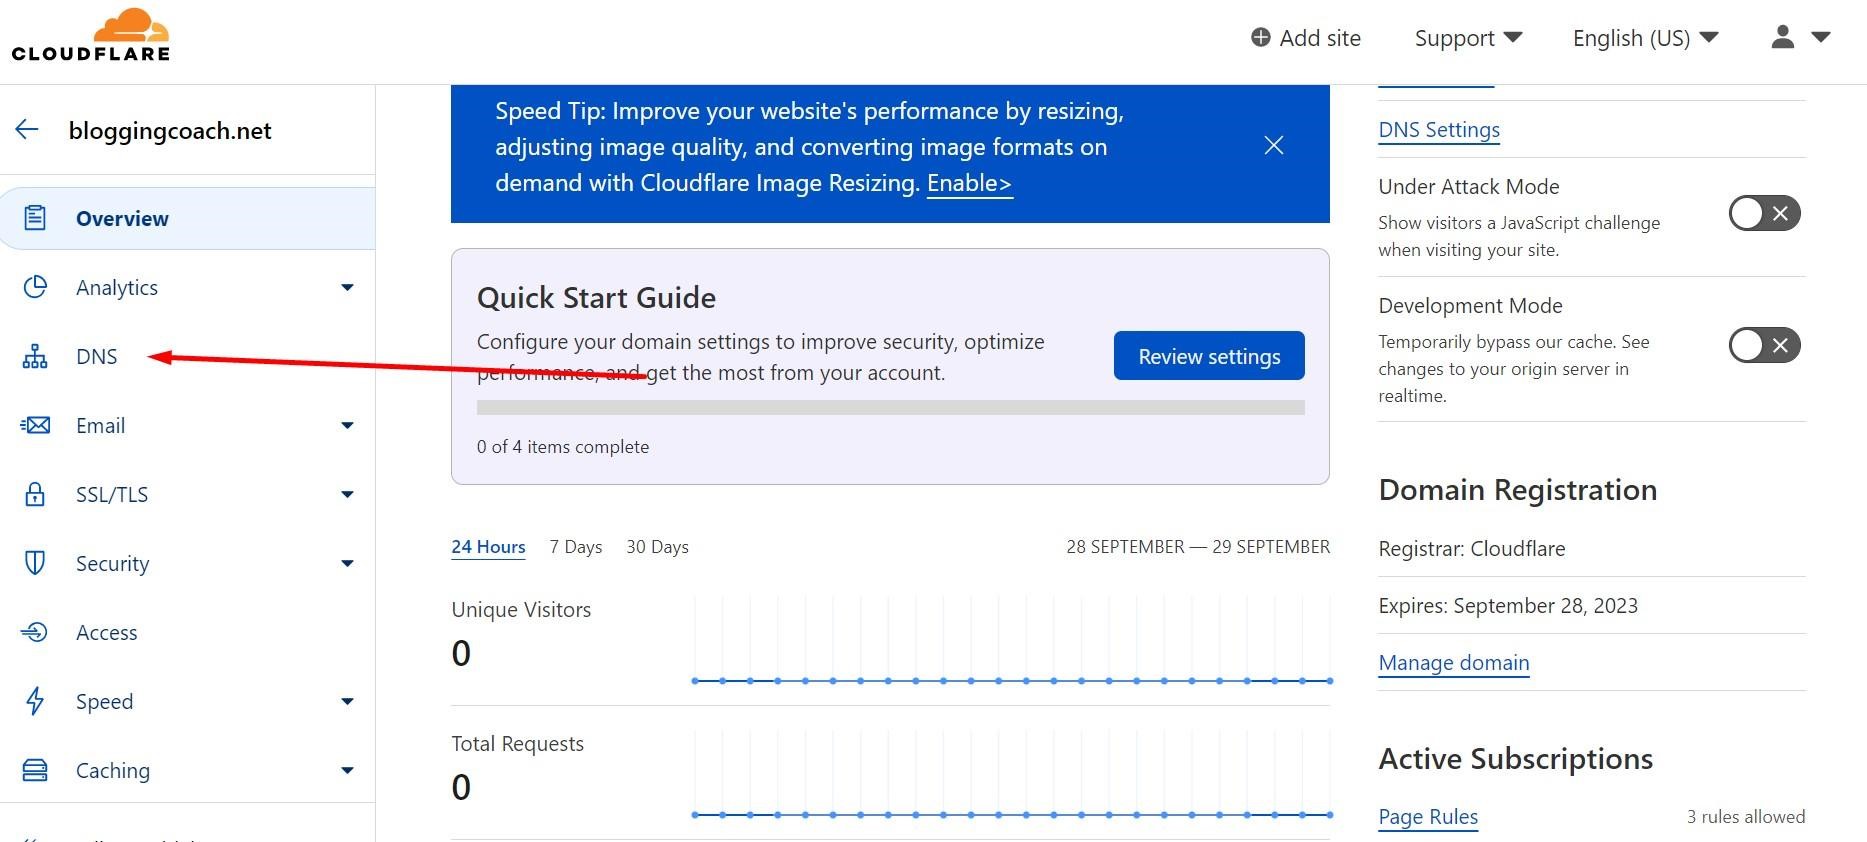
14. Using the sidebar, find and click DNS.
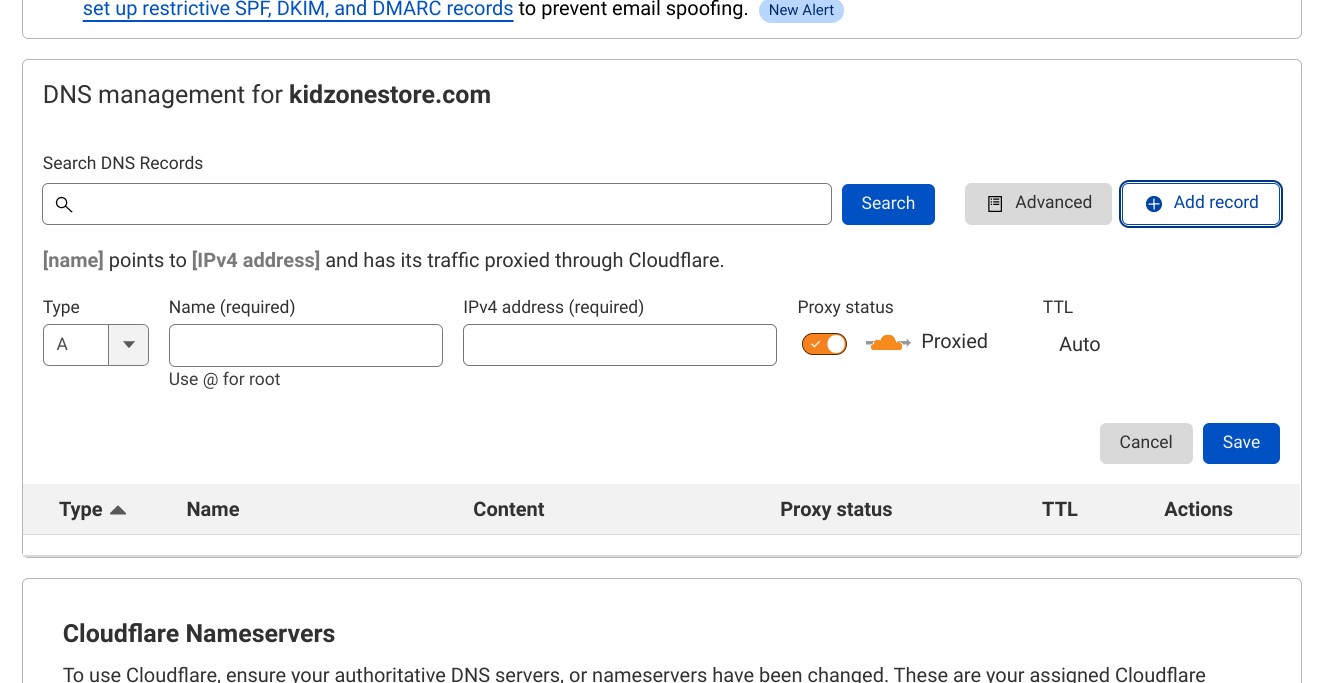
15. From the DNS page, find the section that says DNS management. Then click Add Record.
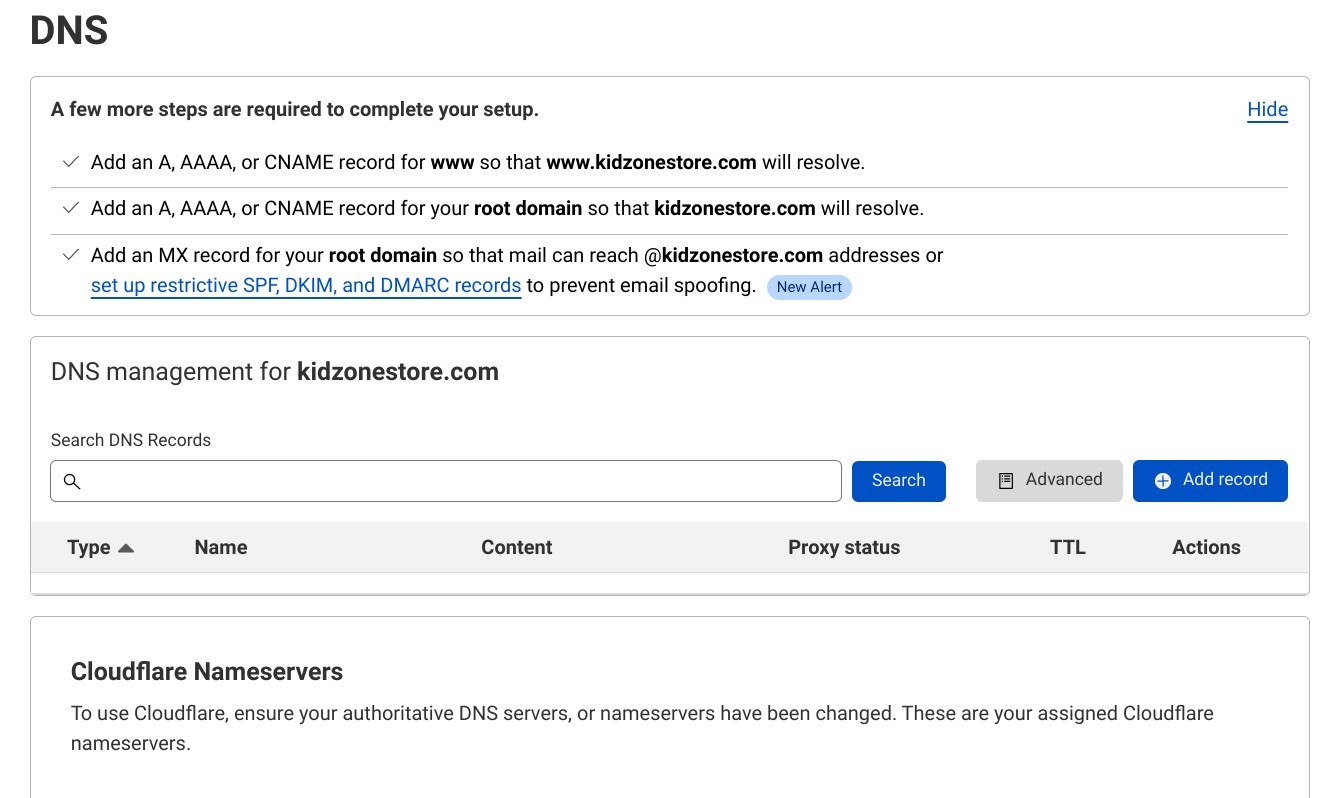
The window will expand. For Type, select A from the dropdown menu. In the Name field, type the @ symbol. For the IPv4 address, paste the copied IP address from Cloudways (right-hand side of the Access Details page.). After the fields are filled, don’t forget to press Save.
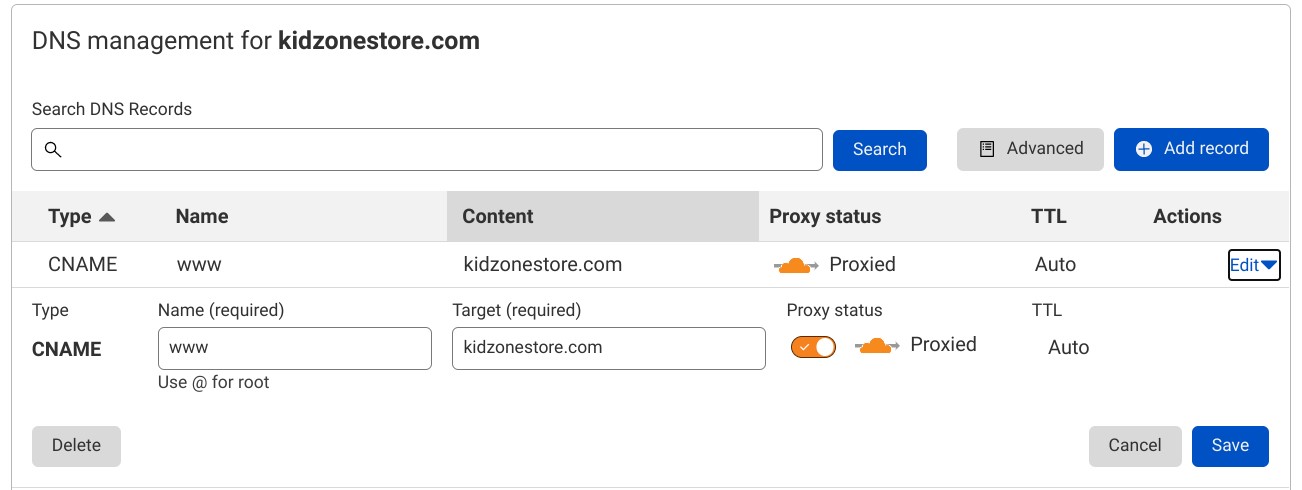
16. Now, you need to add a second record. Start by clicking Add record again. This time, choose CNAME for Type. In the Name field, write down www, then for the Target field, write @. Then press Save.
Tip:
With this record, when people type your website domain name with www., they can access your site because it will redirect properly.
5. Link Your Domain Name #
17. It’s time to add your domain name to your WordPress site. On Cloudways, navigate to the Domain Management tab and add your domain name.
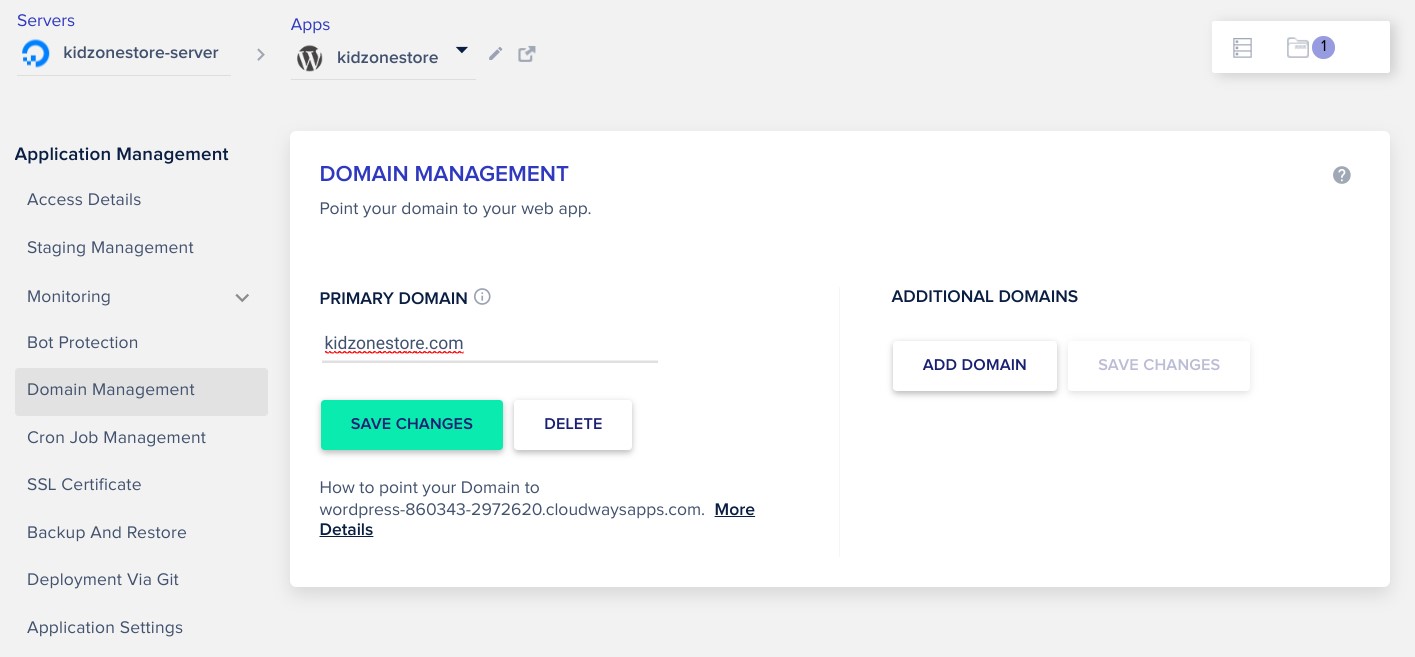
After adding your domain name, don’t forget to hit the Save Changes button.
6. Add Free SSL Certificate #
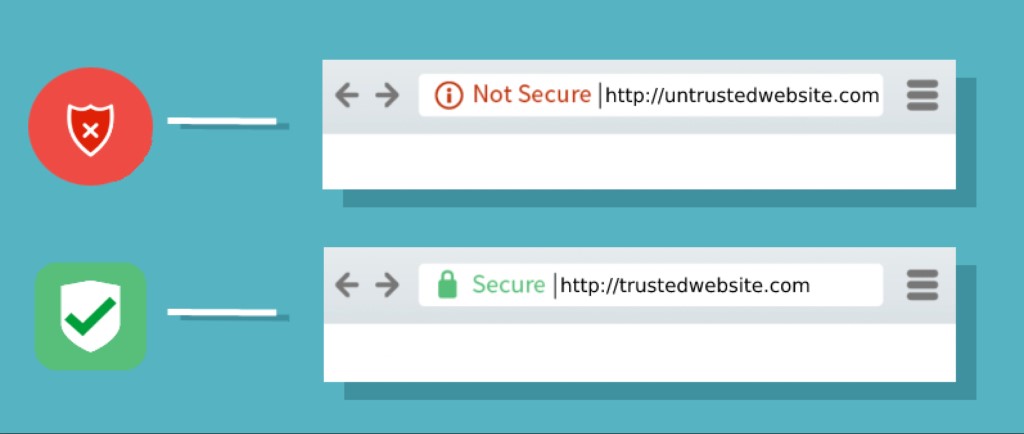
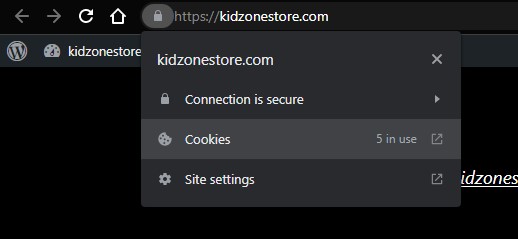
At this point your Cloudways server has WordPress installed and is connected to your Cloudflare domain name. If you haven’t added an SSL certificate, then anyone that visits your site will see a ‘Not Secure’ tag next to your domain name in the address bar. An SSL certificate is essential for security, SEO, and your site’s reputation.
18. Under the SSL Certificate tab, you will see that Cloudways offers a free SSL certificate to your site using Let’s Encrypt. This is a great offer!
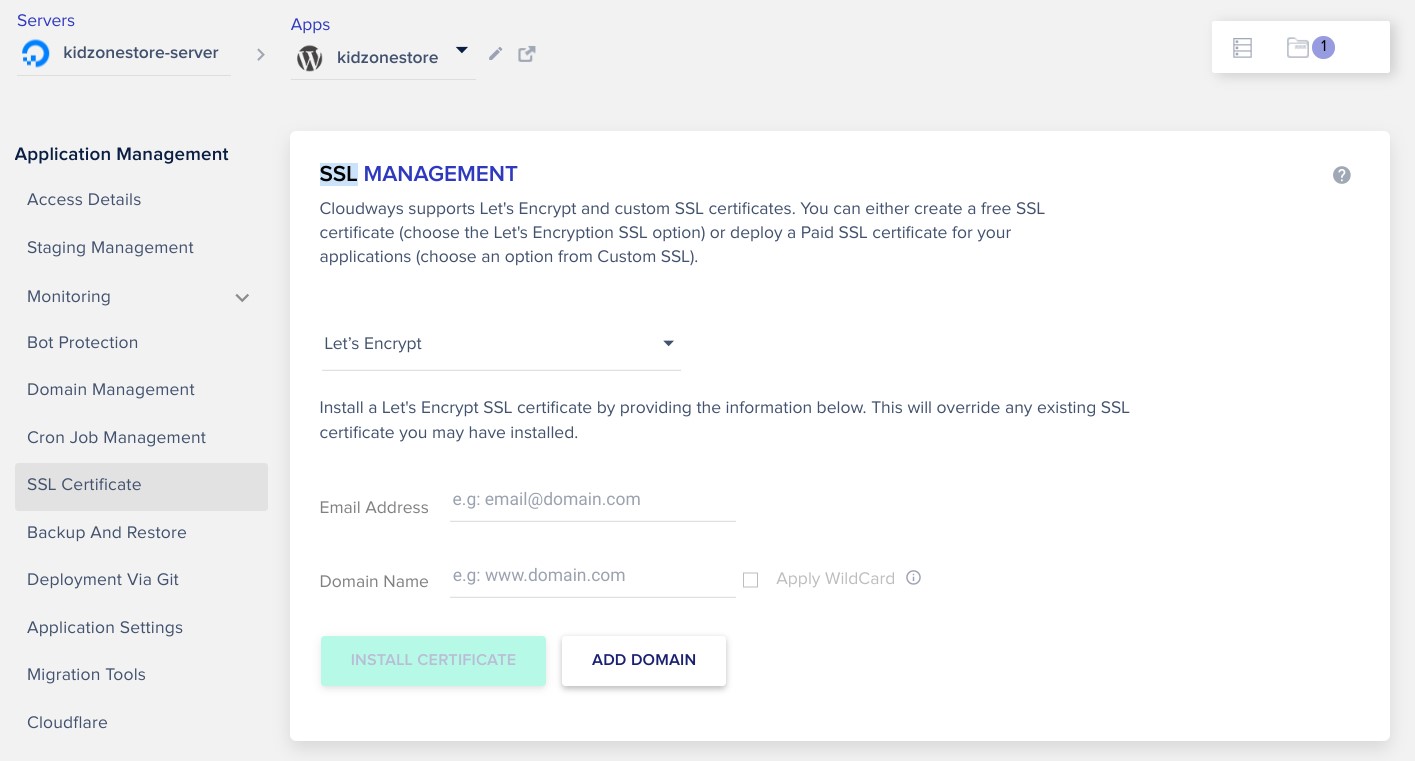
Fill in the Email Address and Domain Name and hit the Install Certificate button to launch the certificate installer.
Tip:
It may take a while to install the certificate. Make sure you have added your domain to Cloudways before installing the SSL certificate, or else it will throw an error.
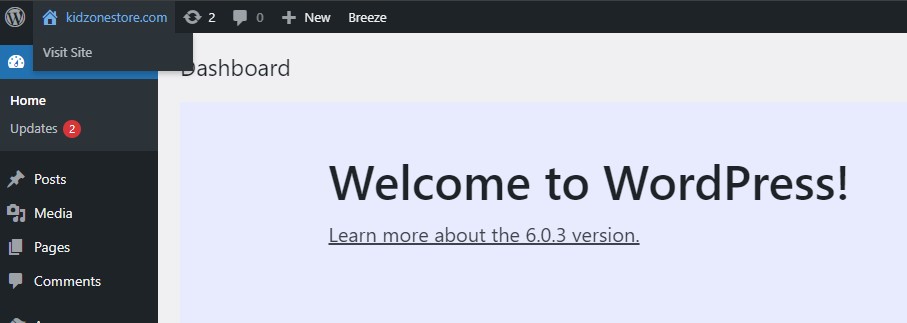
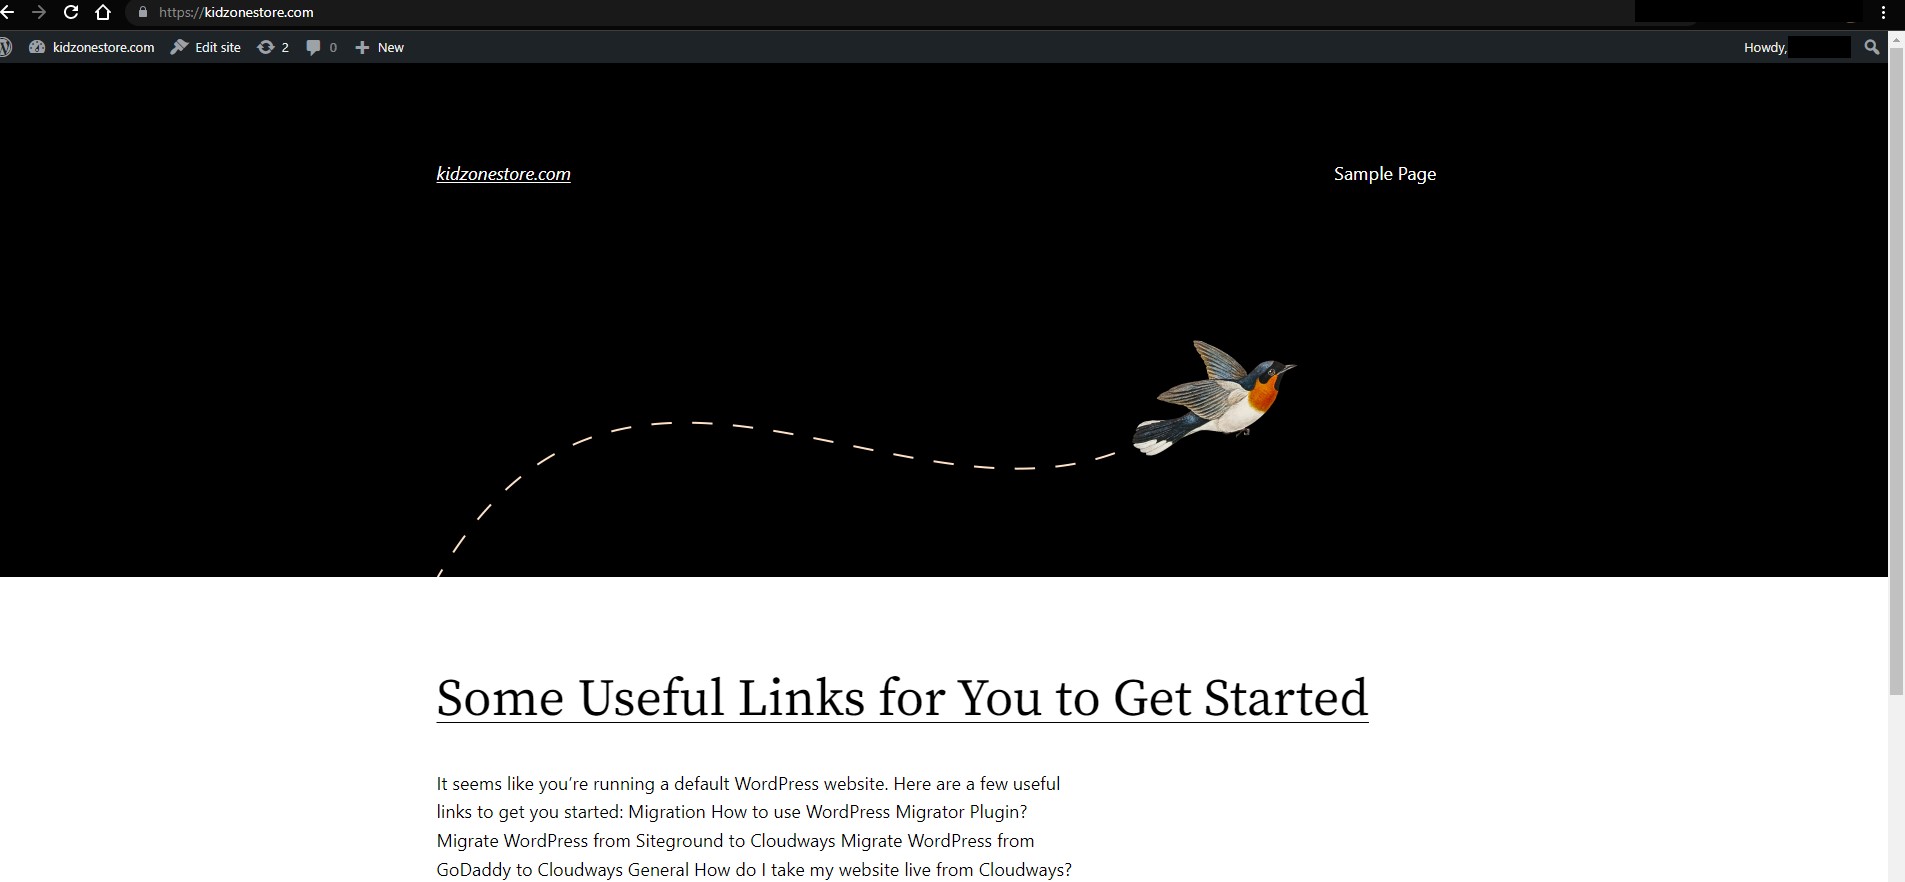
19. Once your SSL certificate is added, head back to your WordPress site. Hover over your domain name in the top-left-hand cover and select Visit Site from the dropdown menu.
The image below shows what your website looks like after WordPress and an SSL certificate have been freshly installed.
7. Access Admin Panel #
20. Once you’ve finished setup your Cloudways server and installed WordPress, then connected your Cloudflare domain to your WordPress site, you can use your domain to access the admin panel.
Use the following address template to directly navigate to your WordPress website’s admin panel:
https://[your-domain-name].com/wp-admin/
For our site, it looks like this:
https://kidzonestore.com/wp-admin/

You’ll need to log in using the information provided in Cloudways, but you can ask your browser to save your password so you don’t have to refer to Cloudways every time.
Tip:
Save your admin panel URL as a bookmark because you are going to be here spending most of your time on this page!
Next Steps #
You have completed the tutorial on how to install WordPress! You created a web hosting account with Cloudways, deployed your first server, installed WordPress, and connected your Cloudways server with your Cloudflare domain. You are ready for the next step in your eCommerce journey.
In the following tutorial, you’ll get to know the WordPress admin dashboard and follow along with another step-by-step walkthrough explaining the dashboard’s functionality and features.
Frequently Asked Questions #
Yes, WordPress offers web hosting on WordPress.com.You can select from both free and paid plans. WordPress is automatically installed on your website and updated as needed.
When you host your site with WordPress.com, you will not need to purchase a domain name because WordPress will give you a subdomain. It will be in the format www.mysitename.wordpress.com. This is not an ideal option as far as SEO and commercial visibility are concerned, but it’s a viable option for beginners.
When installing WordPress, you are adding the WordPress software to your web server. For some web hosts, you’ll need to manually install WordPress to your web server through the web web hosting control panel. This involves downloading and unzipping the WordPress package. You might also need to create a MySQL database for WordPress and rename a wp config sample.php file to wp config.php. Then you’ll upload WordPress files to your web server before you can finally run the WordPress installation script.
We recommend Cloudways because their UI is intuitive, and WordPress gets installed in just a few clicks. No need to hassle with the control panel, FTP client, unzipping, databases, or installation scripts. Cloudways keeps the installation process simple and the way to go if you’re a beginner in creating a WordPress website.
Technically, yes, you can run a website without using a hosting provider. But you will still need a physical device to act as a hosting server. For most beginners, the technical setup to run your computer as a hosting server is far too advanced. Stick with a reputable budget-friendly hosting provider.
There are two primary DNS host record types, IPv4 and IPv6. IPv4 uses a 32-bit IP address in a format that most of us recognize. For example, 192.0.124.23 is an IPv4 IP address. While IPv6 is the newer protocol intended to replace IPv4 because the world is running out of unique IP addresses because of so many computers, mobile devices, and IoT devices. The IPv6 protocol
uses 128-bit IP addresses, meaning there are 340 trillion trillion trillion possible unique IP addresses. An IPv6 address looks like this: 26fb:853b:cf05:cda4:1b9d:8fe7:1cf2:abcf.
These DNS host record types store a hostname (domain name) and corresponding IPv4 or IPv6 address.


