- What Are Plugins In WordPress?
- Free Or Premium WordPress Plugins?
- Where Can You Find WordPress Plugins?
- Types Of WordPress Plugins
- How To Choose The Right Plugin?
- How To Install A WordPress Plugin?
- How Often Should You Update Your WordPress Plugins?
- How To Update Your WordPress Plugins
- How To Remove Or Deactivate WordPress Plugins?
- How Many Plugins Are Too Many?
- What’s Next?
- Frequently Asked Questions
After you’ve installed WordPress and familiarized yourself with the admin dashboard, you can explore plugins. Plugins are the bread and butter of WordPress. Without plugins, the WordPress core lacks the functionality and features for building a modern site. But this design was intentional. WordPress core stays simple, so you can build a site however you want. And Plugins (also themes!) are the way to do that.
But how do you choose a good WordPress plugin? How do you install a WordPress plugin? And what about managing and updating plugins?
You’ll find the answer to those questions and many more within this tutorial. Continue reading to learn the types of WordPress plugins, best practices for choosing plugins, and how to install, add, and activate WordPress plugins.
- What Are Plugins In WordPress?
- Free Or Premium WordPress Plugins?
- Where Can You Find WordPress Plugins?
- Types Of WordPress Plugins
- How To Choose The Right Plugin?
- How To Install A WordPress Plugin?
- How Often Should You Update Your WordPress Plugins?
- How To Update Your WordPress Plugins
- How To Remove Or Deactivate WordPress Plugins?
- How Many Plugins Are Too Many?
- What’s Next?
- Frequently Asked Questions
What Are Plugins In WordPress? #
WordPress plugins are software snippets that ‘plug in’ to your website to offer new functionality and features.
WordPress core keeps things simple so that the site-building process is open to every user. You’ll probably want to install WordPress plugins to improve your user experience and add essential functionality to your site. WordPress is built around a thriving community where developers can create plugins to modify WordPress functionality or add new features.
With over 58,000 plugins in the WordPress directory, you can find a plugin that suits your needs. If you can dream it up, someone else probably already did and made a helpful plugin!
Free Or Premium WordPress Plugins? #
You can select from thousands upon thousands of free or premium WordPress plugins.
A premium plugin is a paid plugin that offers premium features and better user support. Usually, you pay for a premium plugin on a yearly basis, but some plugins offer monthly subscriptions. While free plugins can get the job done, sometimes the functionality is too basic, and you need extra options or more dedicated support from the plugin developer. After trying the free version, you can more comfortably agree to pay for the advanced features a premium plugin provides.
Paid plugins are maintained better and are more likely to be compatible with many other plugins and themes. If a paid plugin interacts unintentionally with other plugins, you can contact the support staff for help.
When starting with WordPress plugins, it’s a good idea to go with the free options first. You can find a paid option if you need a higher level of support or would like some advanced features.
Where Can You Find WordPress Plugins? #
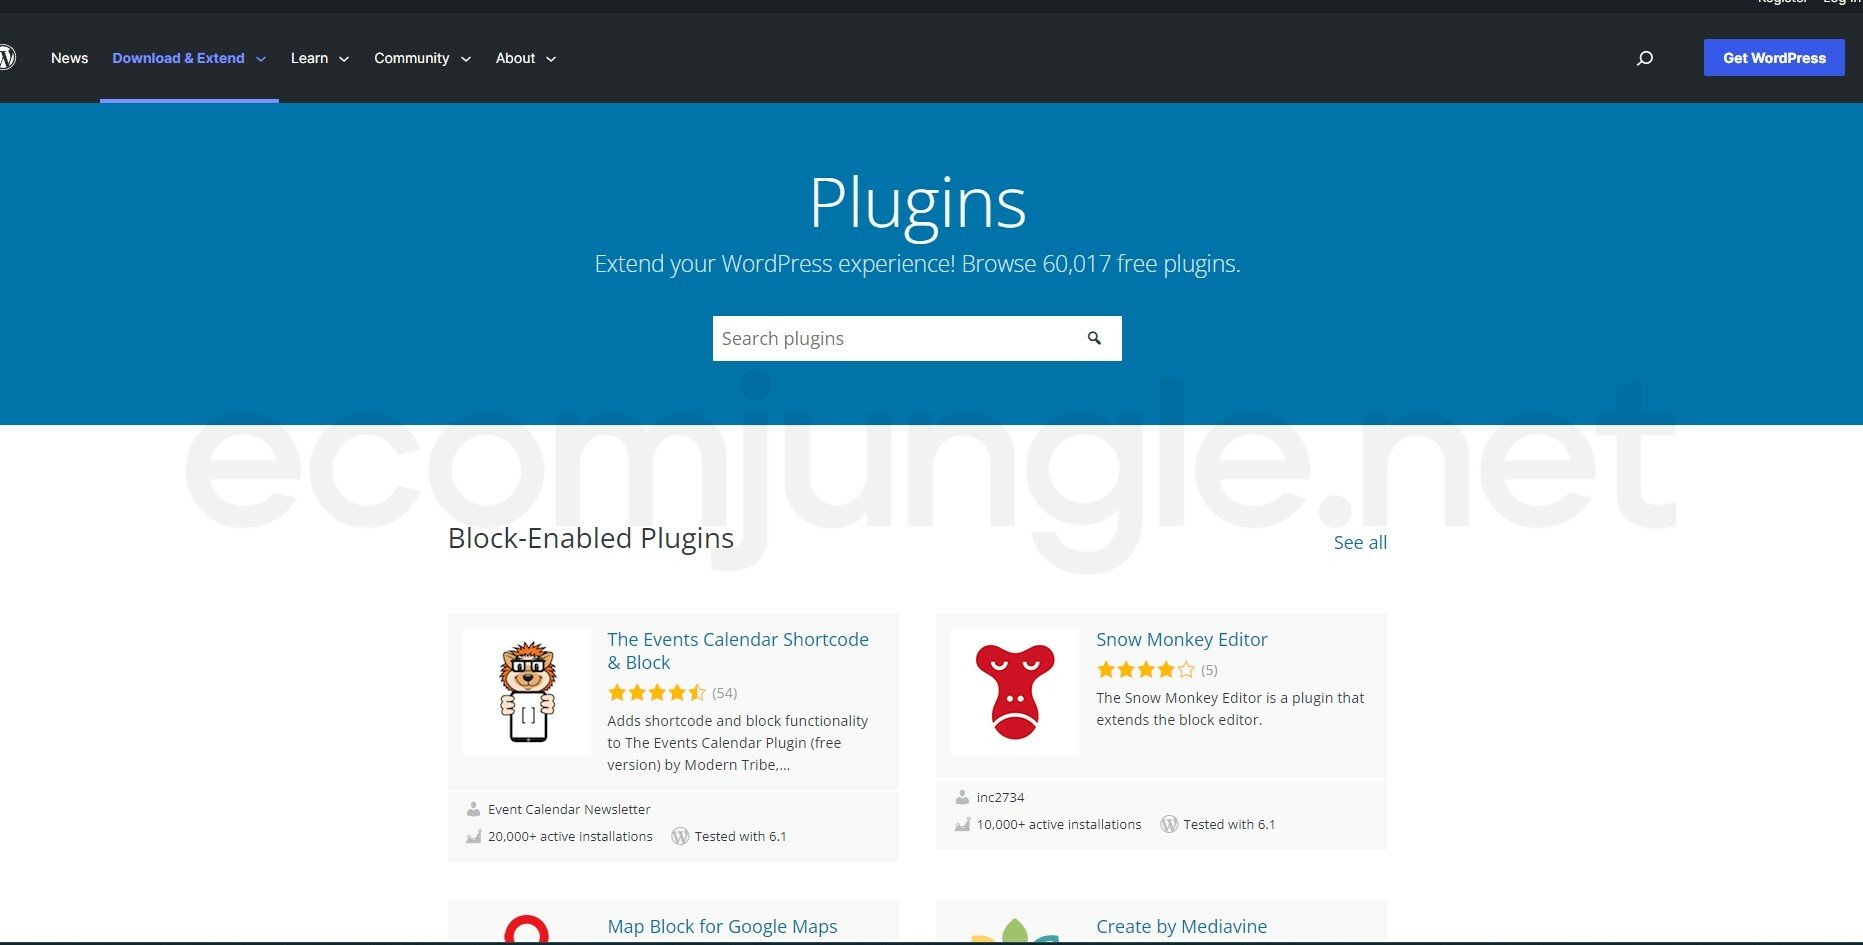
WordPress.org hosts the official WordPress plugin directory with over 58,000 plugins. This directory is the best place to find plugins, and it’s super easy to install and activate plugins from the directory directly from your WordPress admin area.
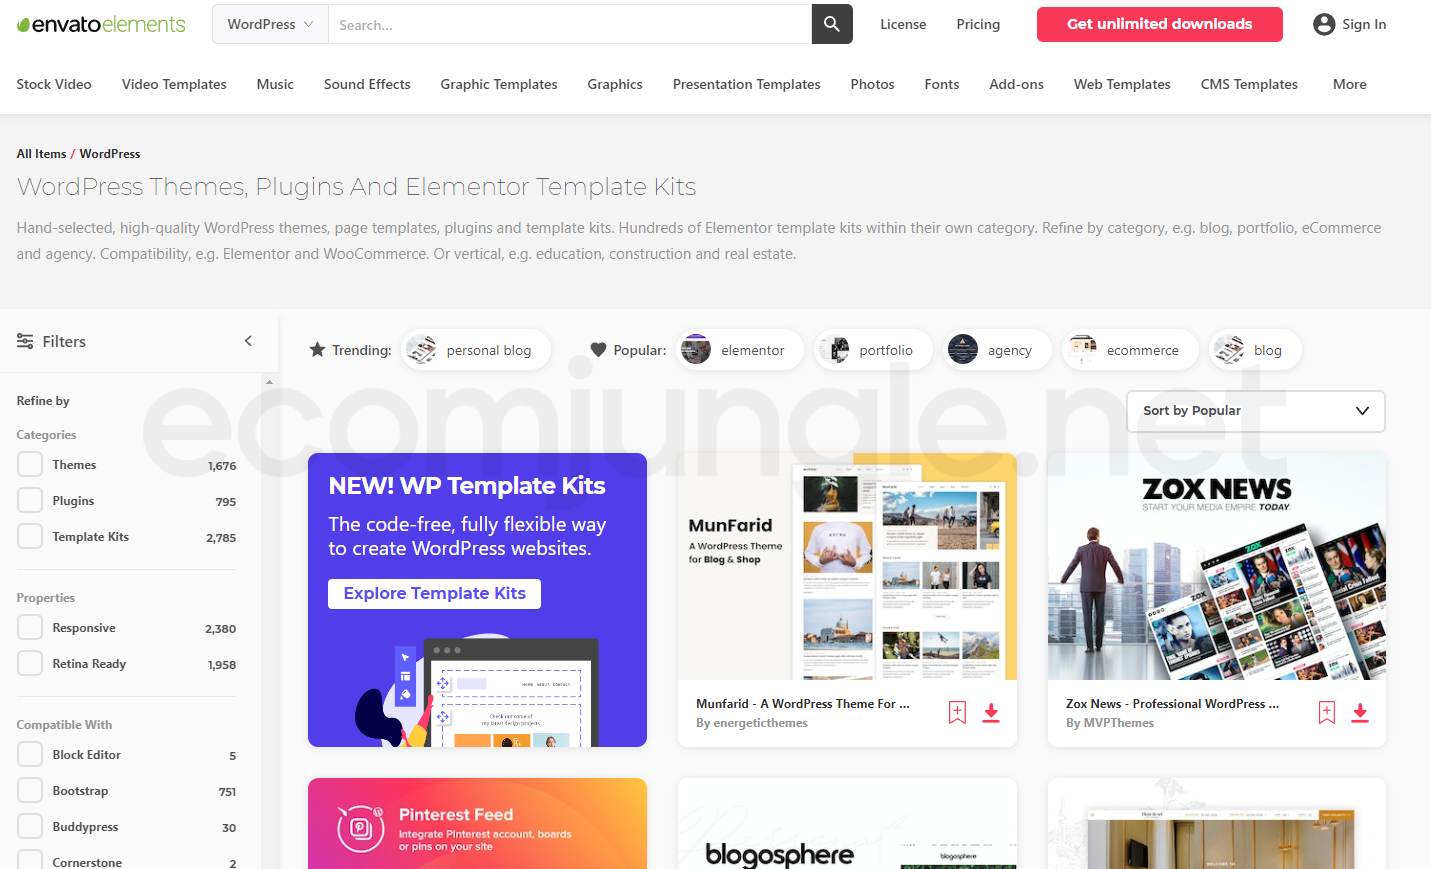
The WordPress directory is not the only option. You will need to head to external sites to find some premium WordPress plugins off the directory from places like Code Canyon and Envato Elements. Code Canyon has an extensive list of premium WordPress plugins available for purchase.
In contrast, Envato Elements is a subscription service that gives you access to thousands of WordPress themes and plugins, fonts, images, and other content.
Besides the marketplace options, you can find additional plugins on the websites of third-party developers. To find these sites, you’ll probably need to use Google.
Tip:
Do not look for third-party options to get premium plugins for free. This practice is theft. Plugin developers work hard to create plugins, and if they want to charge for their plugin, you should pay for it or go with a free option. Besides the morality issue, pirated third-party plugins may contain malicious code that compromises your site.
Types Of WordPress Plugins #
While there are plugins for virtually anything, most plugins fall into a few neat categories. These plugin types can be a good starting point when picking your first plugins. Try to choose one good plugin from each category when getting started.
Let’s look at these main plugin categories to understand better how they can help your website:
1. Website Optimization Plugins #
Keep visitors on your site with a properly optimized website. If your website isn’t optimized, it may feel slow and clunky. Users will click off your site before you can make any meaningful impressions. Website optimization plugins will speed up your load times and improve your site’s performance.
WP Rocket, WP Fastest Cache, W3 Total Cache, and WP-Optimize are all great options with hundreds of thousands of happy users.
2. Security Plugins #
WordPress websites make up almost half of the websites on the internet. This dominance means they are a massive target for cybersecurity attacks as hackers seek to steal data and corrupt sites with malware. Popular security plugin WordFence reported 4.3 billion attempted cybersecurity attacks in 2020. To protect the integrity of your site and your user’s data, block malicious attacks with a high-quality security plugin.
WordFence, iThemes Security, and All In One WP Security are excellent security plugins that can help protect your website.

3. SEO Plugins #
Without SEO, your website won’t ‘go’ anywhere. Search Engine Optimization (SEO) is what brings users to your site. SEO is about designing and building a website that ranks well in search engine searches thanks to tags, images, quality content, backlinks, and keywords.
SEO is invaluable, but learning the ins and outs takes a while. Use an SEO plugin to analyze your site’s SEO and receive recommendations on how to improve things.
Popular SEO plugins include Yoast SEO, All in One SEO, and Rank Math SEO.
4. Contact Form Plugins #
Not all WordPress themes include contact forms, but they are essential to modern websites. Contact forms let visitors compose a message and contact you directly from your site. Don’t waste any time trying to code a contact form when there are outstanding plugins that can handle that for you!
Contact Form 7, WPForms, Ninja Forms, Gravity Forms, and Forminator are all great options for customizable contact forms.
5. Analytics Plugins #
You’ll want to monitor your website’s performance analytics closely. Analytics help you find and address issues promptly to improve your user experience.
Google Analytics is a free analytics tool that counts the number of visitors that stop by your site. It collects demographic information, bounce rate, link tracking, and much more.
You can find great WordPress plugins incorporating Google Analytics information in your dashboard for easy tracking. These include MonsterInsights, and Analytify, among others.
6. E-Commerce Plugins #
If you want to build an e-commerce site, you’ll probably want to install an e-commerce plugin to help you build a beautiful storefront, display products, and increase sales.
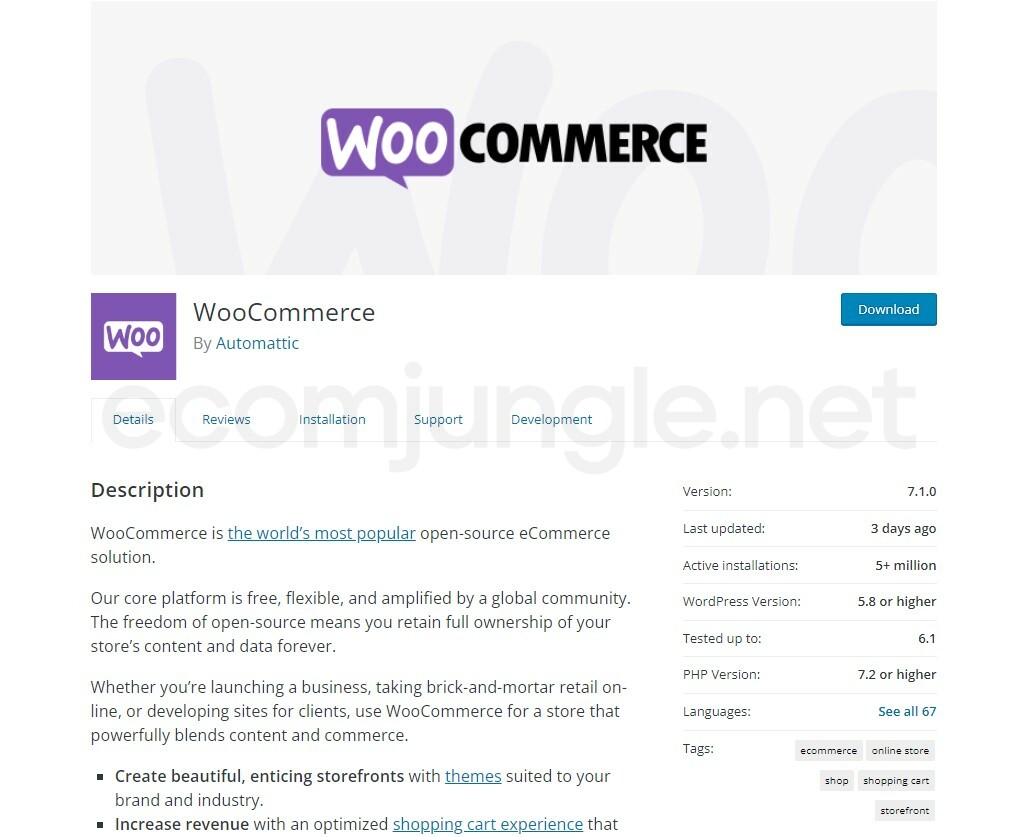
WooCommerce is the number one e-commerce plugin (and the one we’ll be using later in this tutorial series). WooCommerce is incredibly powerful as an e-commerce platform for creating compelling storefronts and customized product pages, managing payments and shipping, and growing your business with improved SEO. You can add additional plugins from the WooCommerce marketplace to further customize your site for all your e-commerce needs.
If you decide not to use WooCommerce, you can find other alternatives. However, they are far less popular and have fewer features:
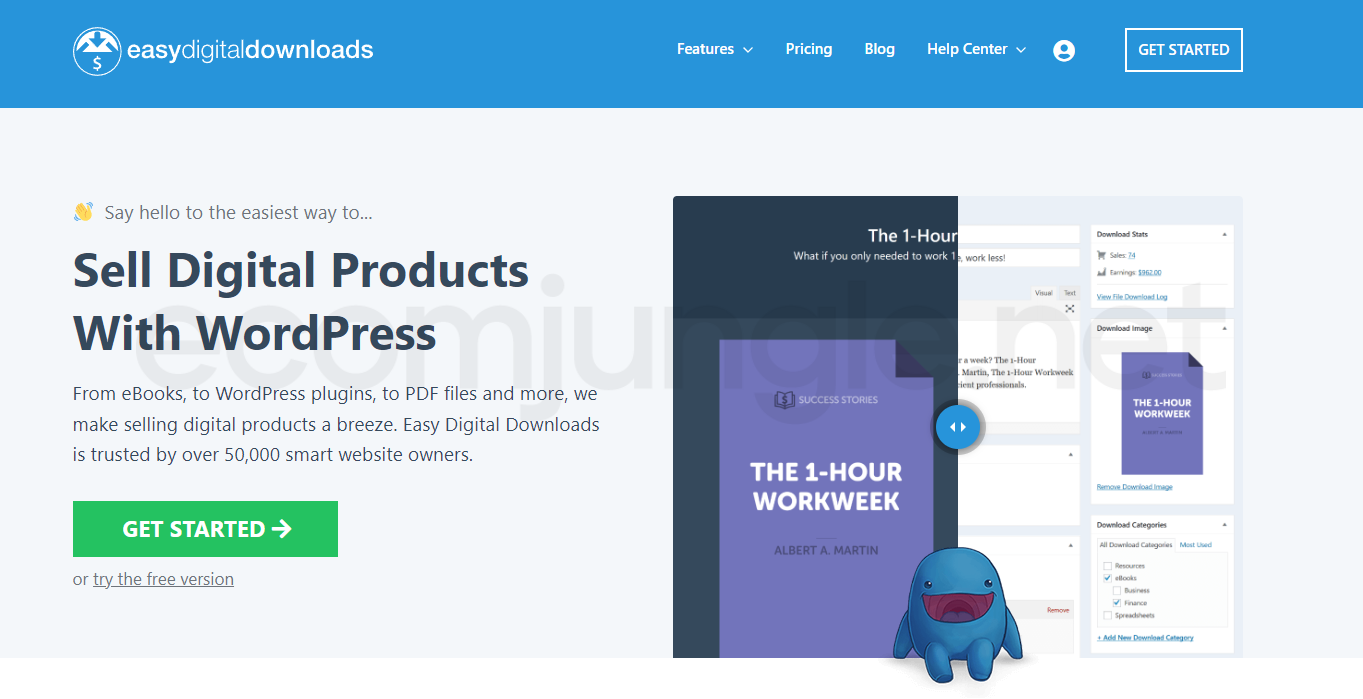
- Easy Digital Downloads WordPress – best plugins for selling digital products
- WP eCommerce – helps you set up a new storefront
7. Image Optimization Plugins #
Image optimization goes hand in hand with site optimization. If your site is going to host lots of images (and it probably will), the way images are loaded, and the image sizes can significantly impact your site’s performance.
Image optimization plugins reduce image sizes and more efficiently handle image loading. Smush is the most popular plugin for this, but other high-quality options like Imagify and EWWW Image Optimizer exist.
How To Choose The Right Plugin? #
With over 58,000 WordPress plugins, picking the right plugin for your needs can be daunting. For every functionality or task, there are probably dozens, if not hundreds, of plugins that you can pick from. But not all plugins are created equally.
All the plugins hosted on WordPress’s official directory have been approved after being manually reviewed. Any plugin in the directory must meet WordPress’s guidelines. While these plugins have been verified, you should do your due diligence to ensure that every plugin you add to your site is safe, secure, and updated.
There are many ways to check or research a plugin and confirm it’s a good pick. You’ll want to see how many other sites are actively using the plugin, check that it has overall good reviews, and see if it is maintained.
Tip:
The Recommended Plugins tab is great for finding good-quality plugins!
Here are a few best practices to help you choose the right plugin: #
1. When was the last update? #
WordPress updates its site often to improve the site-building experience by releasing new features, adding quality-of-life items for users, and addressing any cybersecurity threats. But plugins are created mainly by independent developers, although popular premium plugins like SEO Yoast are handled by a company (in this case, the developers at Yoast).
To ensure a plugin is safe and valuable, you should generally choose WordPress plugins that are regularly updated.
Tip:
Too many updates might indicate the developer is an amateur and struggling to handle Hotfixes and other plugin issues in an organized way. Frequent updates are not always a bad sign, but they are something to look out for.
If a plugin has been updated recently, there’s a good chance the developer is actively maintaining and developing the addon. You can reasonably expect the developer will continue to update the plugin in the future and that you’ll be able to use it for a while.
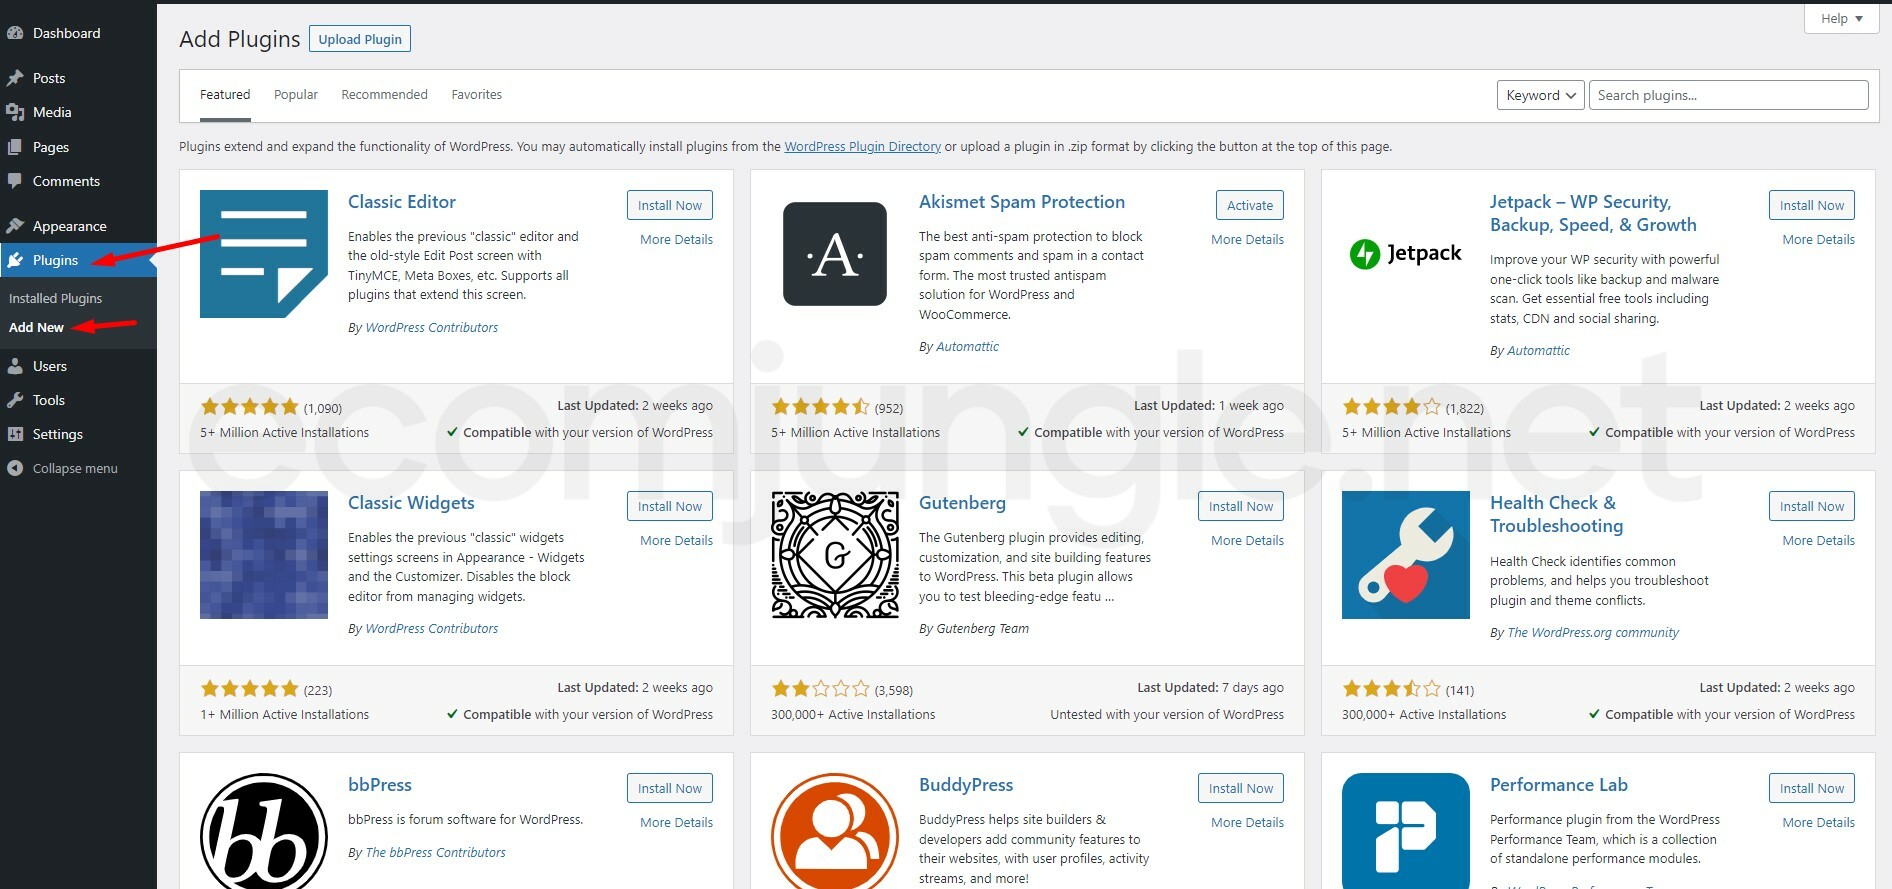
To check when a plugin was last updated, navigate to the Plugins section on your WordPress admin page. Then click Add New to open the WordPress Plugin directory.
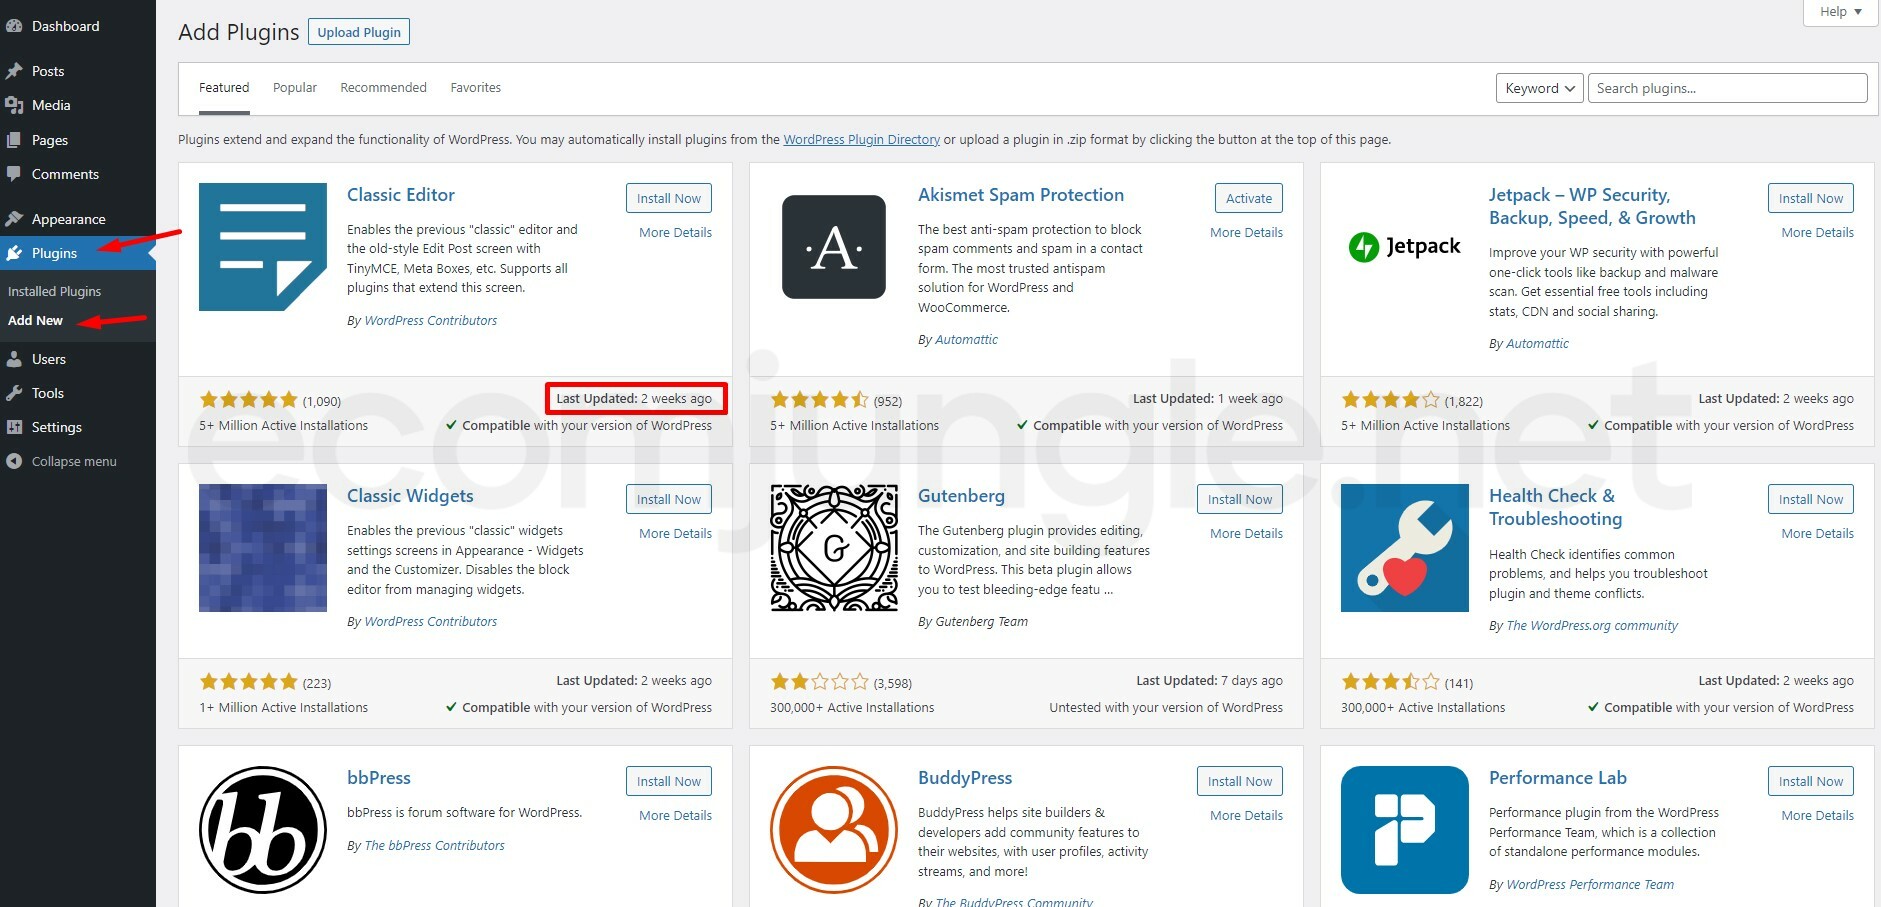
You can quickly check when a plugin was last updated from the plugin ‘panels.’ At the bottom of each plugin panel, you’ll see the reviews, number of active installations, compatibility, and when the plugin was last updated.

As a good rule of thumb, look for plugins that have been updated in the last few months.
Tip:
Some plugins are highly stable and don’t need frequent updates. Infrequent updates aren’t always a reason to exclude a plugin. Check other aspects of the plugin to get the best overall picture.
2. How many active installations? #
Another indicator of plugin health is the number of active installations. Active installations tell you how many WordPress sites are currently using the plugin. Generally, if a plugin is good and offers excellent functionality, it grows in popularity and will have 100,000 to 5 million active installations. The WordPress community is always looking for the next best thing, so hot new plugins are constantly emerging.
Choosing a plugin within the active installation range listed above is best. You want to ensure it’s been tested across enough WordPress websites with many different configurations so you know it won’t break your site or act weirdly.
To check how many active installations a plugin has:
- Navigate to the Plugins section on your WordPress admin page.
- Click Add New to open the WordPress Plugin directory.
- Look under the 5-star rating system located at the bottom of each plugin panel. It’s in the same area you found the Last Updated information.

3. What do the rating and reviews tell you? #
The WordPress plugin rating system is more effective than ever, thanks to some recent updates by WordPress’s developers. If you want to read plugin reviews or check any one or 2-star reviews, click the More Details link.
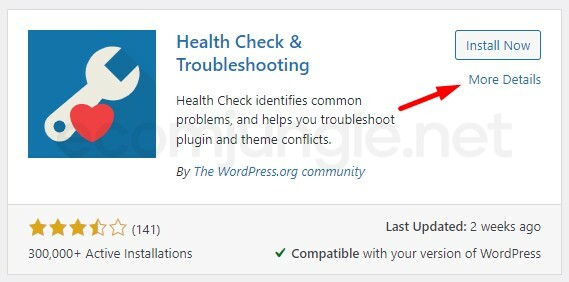
This link will open up a new More Details window. Select the Reviews tab located on the horizontal menu.

Now you can read the plugin’s reviews. To select reviews based on rating, click the number of ratings listed in the panel on the right-hand side.
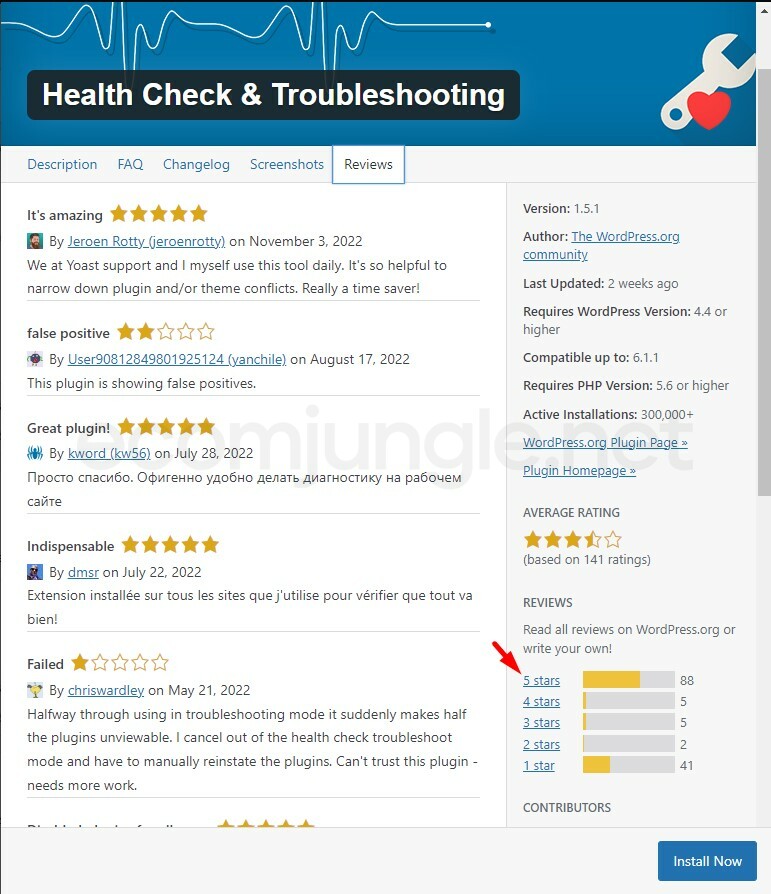
It’s a good idea to select plugins with four or 5-stars. And you should be very wary of plugins with 2-stars or less. 3-star plugins are kind of in the middle ground because they might be helpful, but there are probably a lot of bugs or other issues resulting in lower ratings.
4. Check Support Forums #
With such a large active WordPress community of users and developers, the WordPress.org support forums can be a great place to get help or learn about plugins.
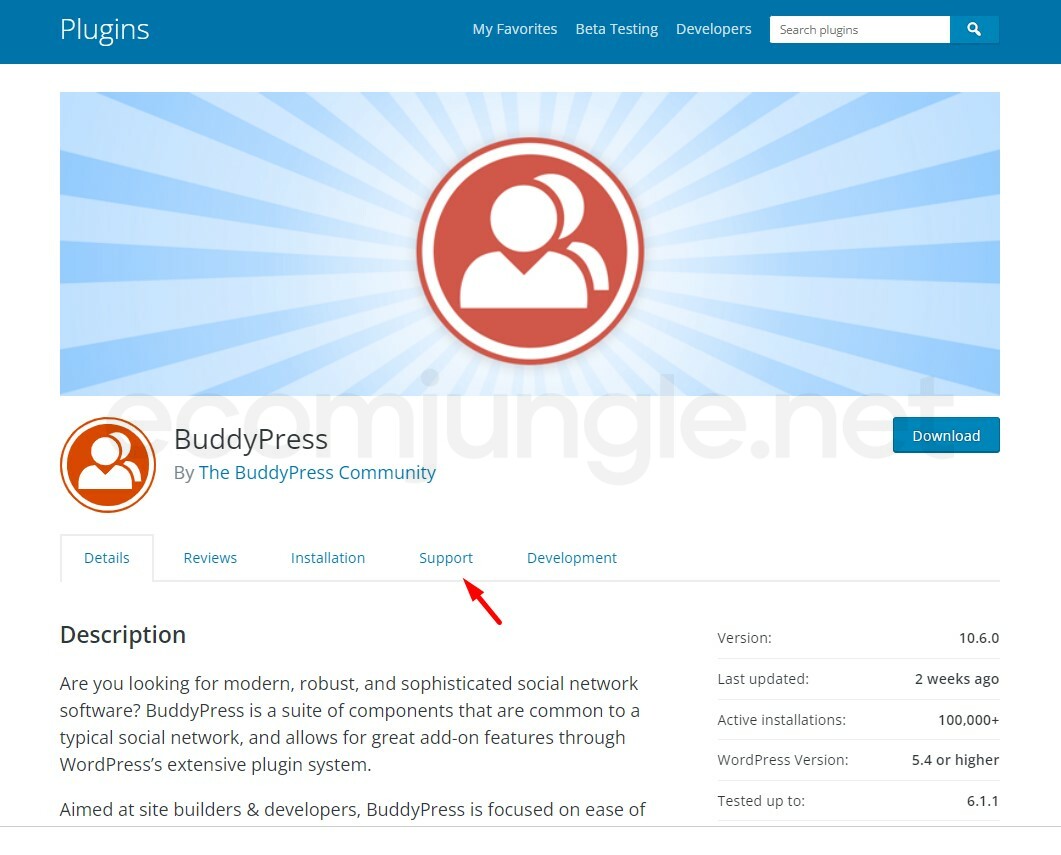
To view the support forum for a specific plugin, click on More Details. Then find and click the WordPress.org Plugin Page link on the right-hand side.
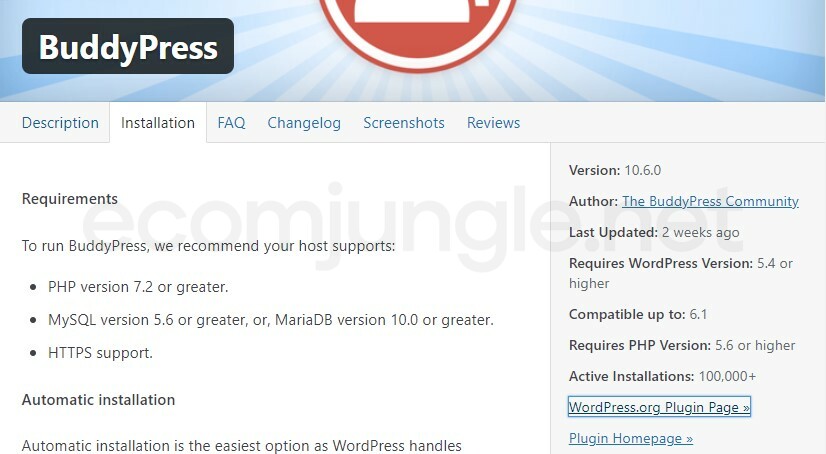
When the extended plugin page on the WordPress website opens, click the Support tab.
Now you are on the plugins Support page and can read through forum topics and necessary plugin documentation.
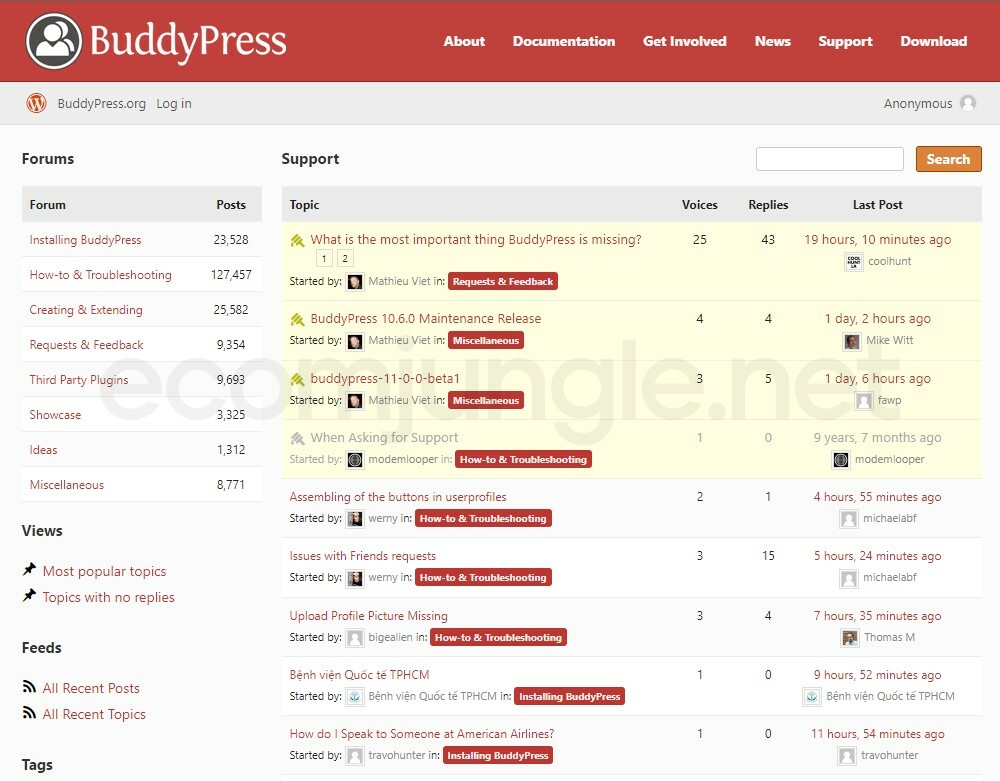
You want to look for recent activity on the forum. Some great plugins will have few support posts, but most popular plugins are going to have very active discussions full of users looking for help or requesting more features.
Tip:
Avoid plugins where the support forum has many requests but little to no discussion or replies. Usually, this means the developer is no longer actively supporting the plugin, so if you choose it, you’re on your own if anything goes wrong.
How To Install A WordPress Plugin? #
If you’ve picked out a plugin and are ready to add it to your site, the plugin installation process only takes a few clicks. To add plugins, follow these steps:
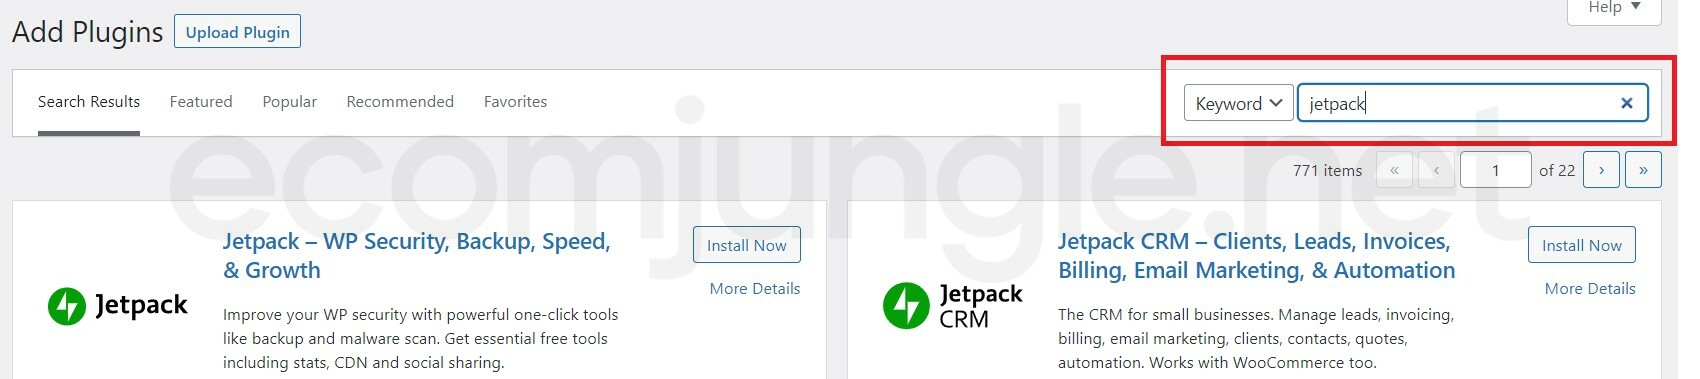
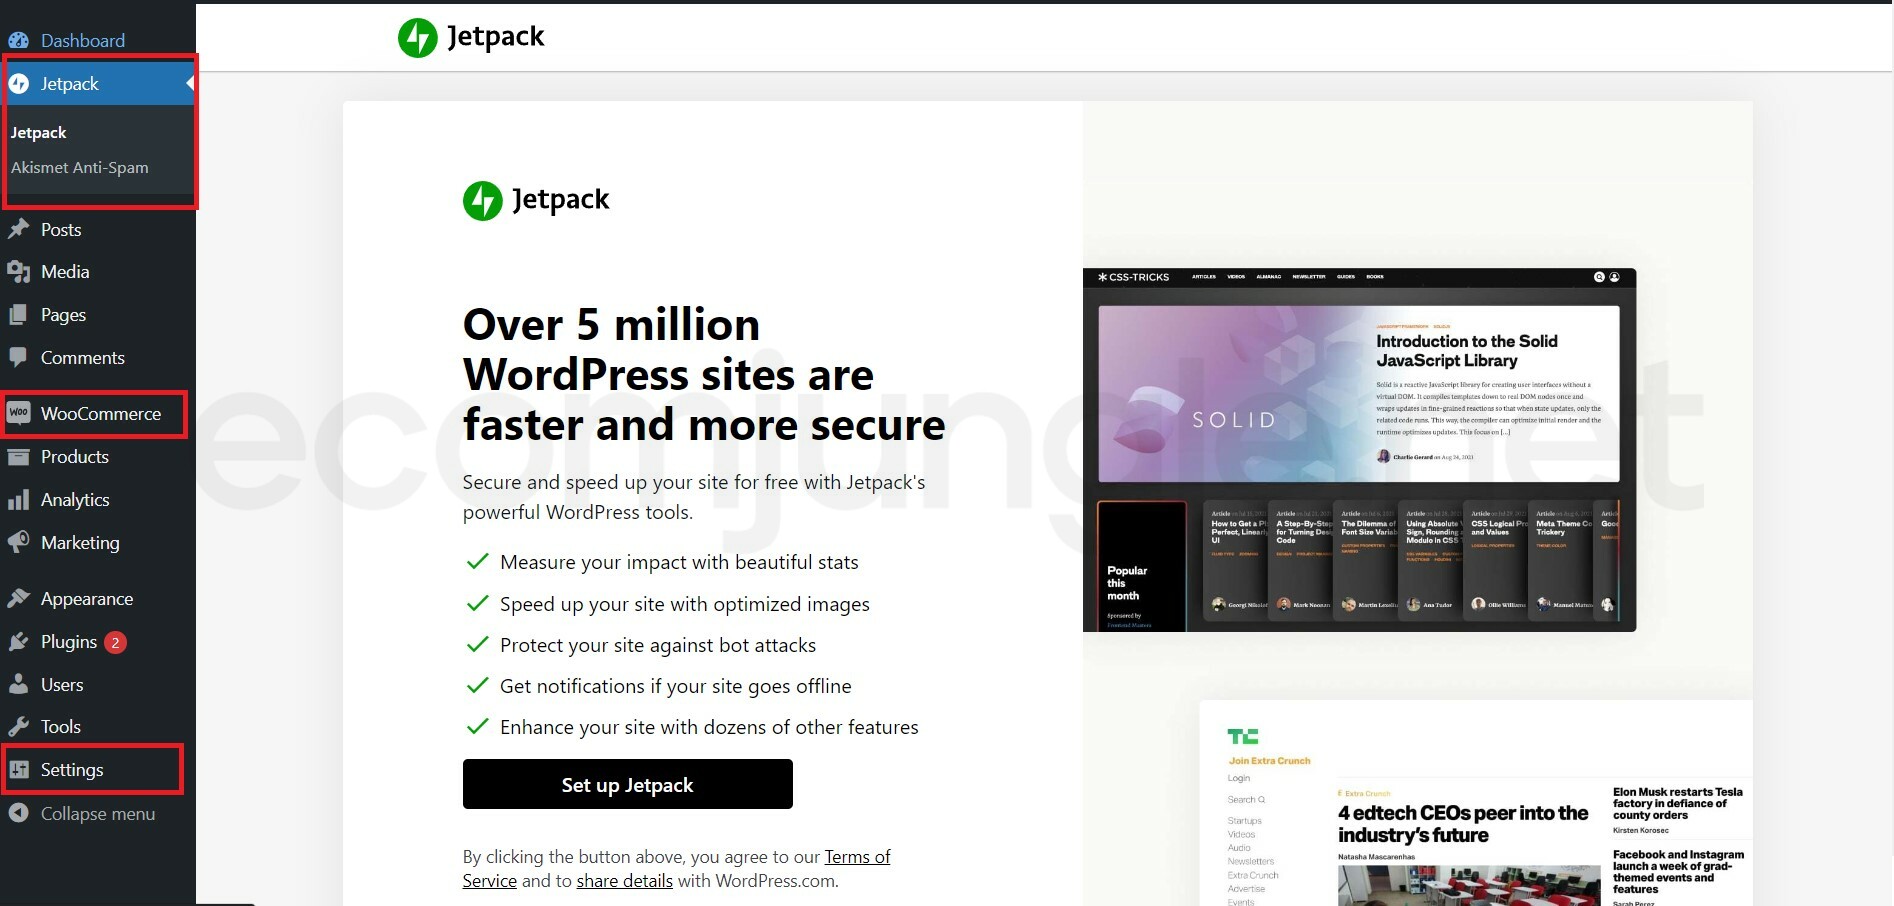
1. Head to your WordPress dashboard and click Plugins from the sidebar menu. Then click the Add New option.
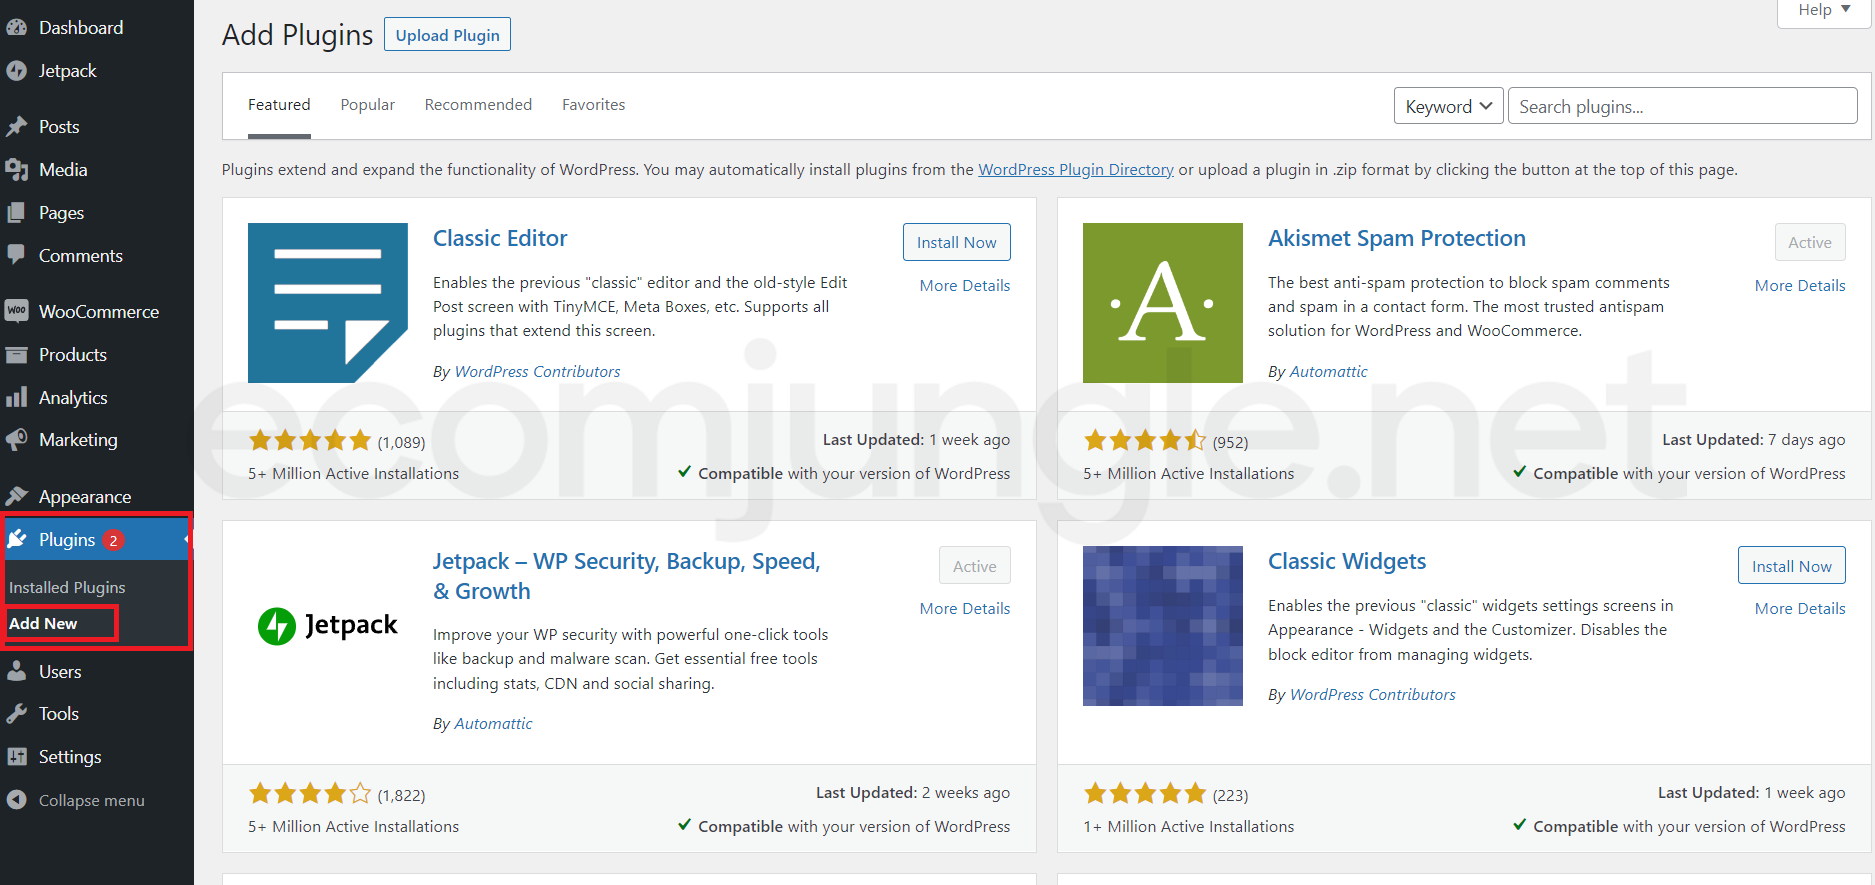
2. Use the search bar to look for the plugin you want to install. For this example, we’ll be using Jetpack.
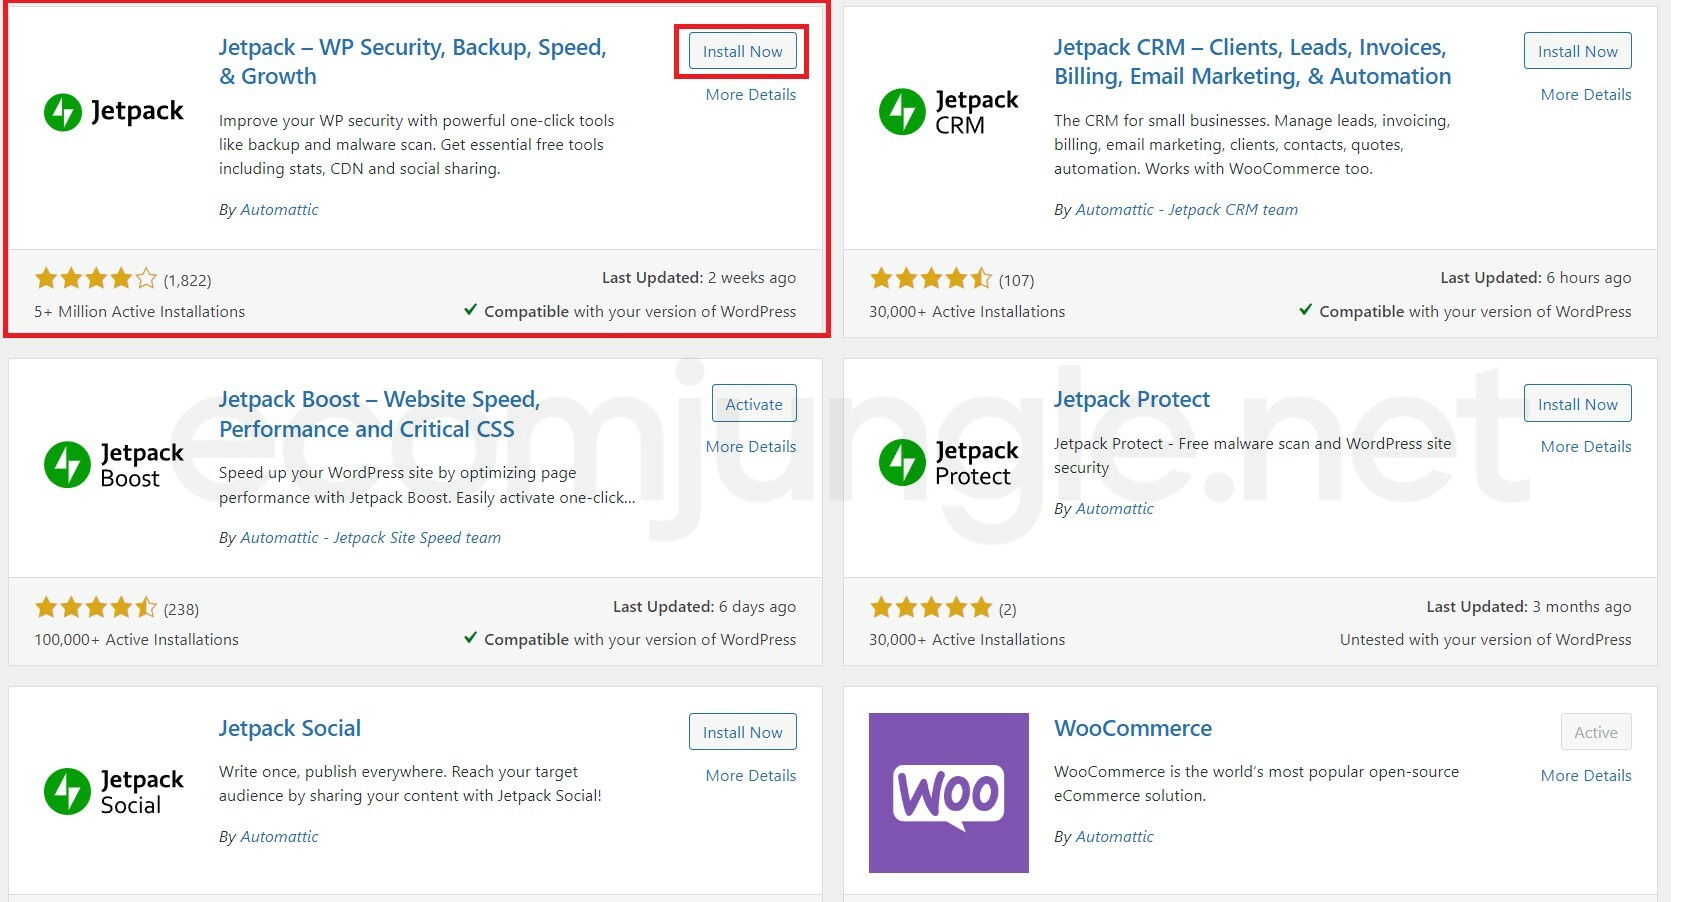
3. Once you’ve located the plugin you want to install, click Install Now in the top-right of the plugin panel.
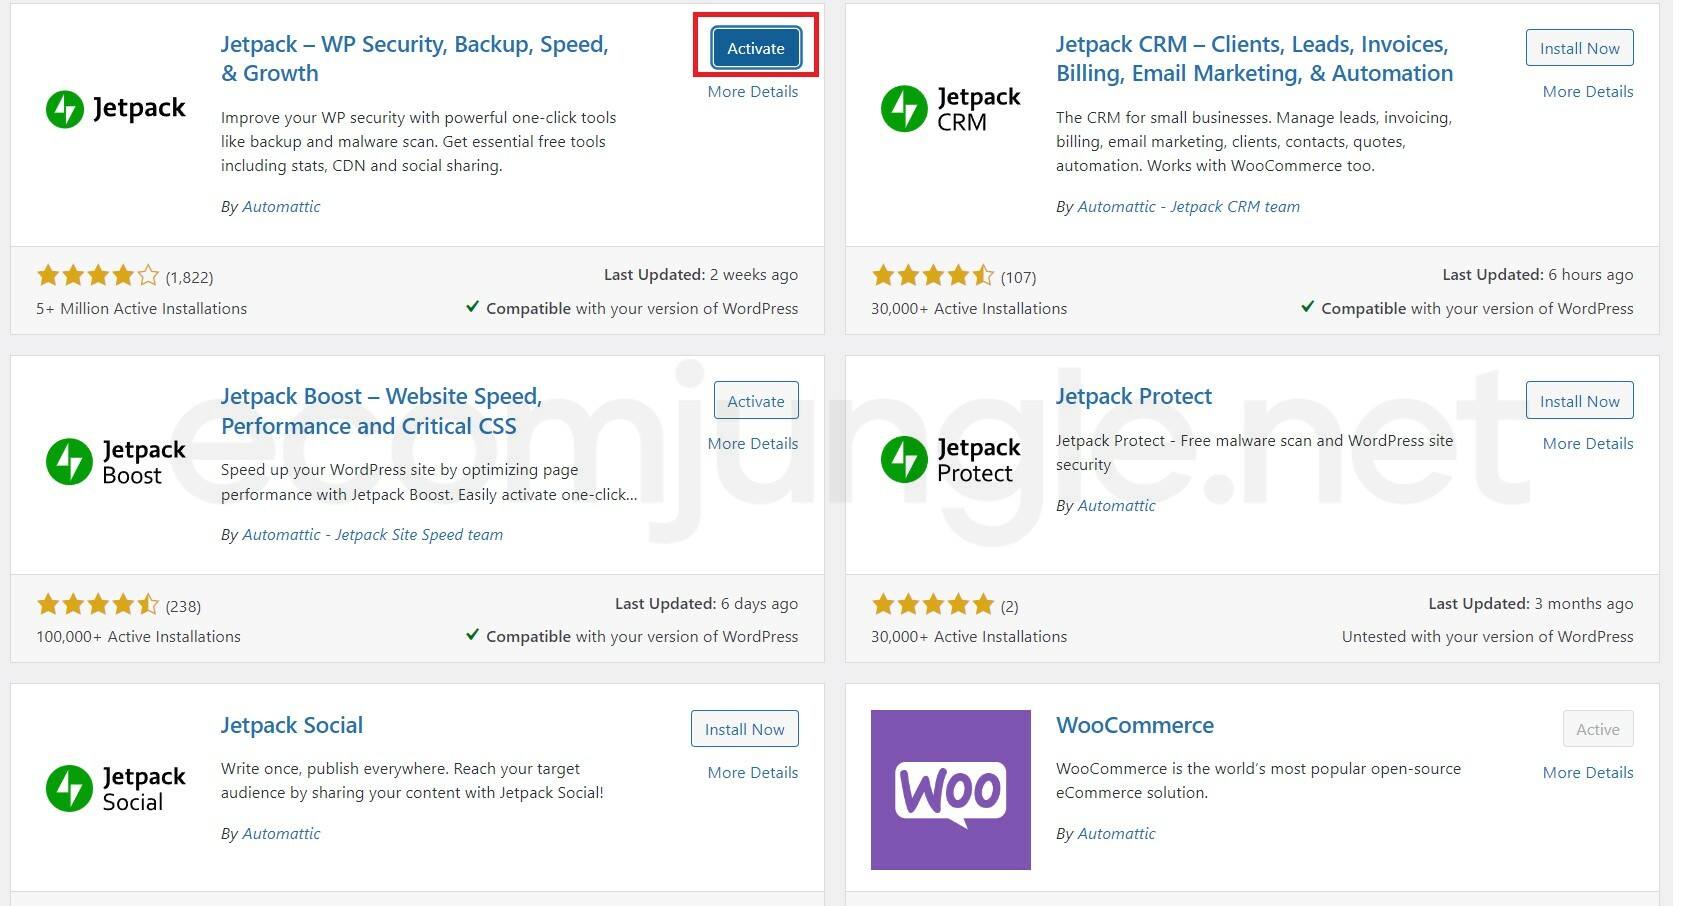
4. You’ll know the installation is complete when the Install Now button is replaced with an Activate button. Click Activate to activate the plugin for your website so it’s ready to use. You can install as many plugins as you want, but they won’t work on your site until they are activated.
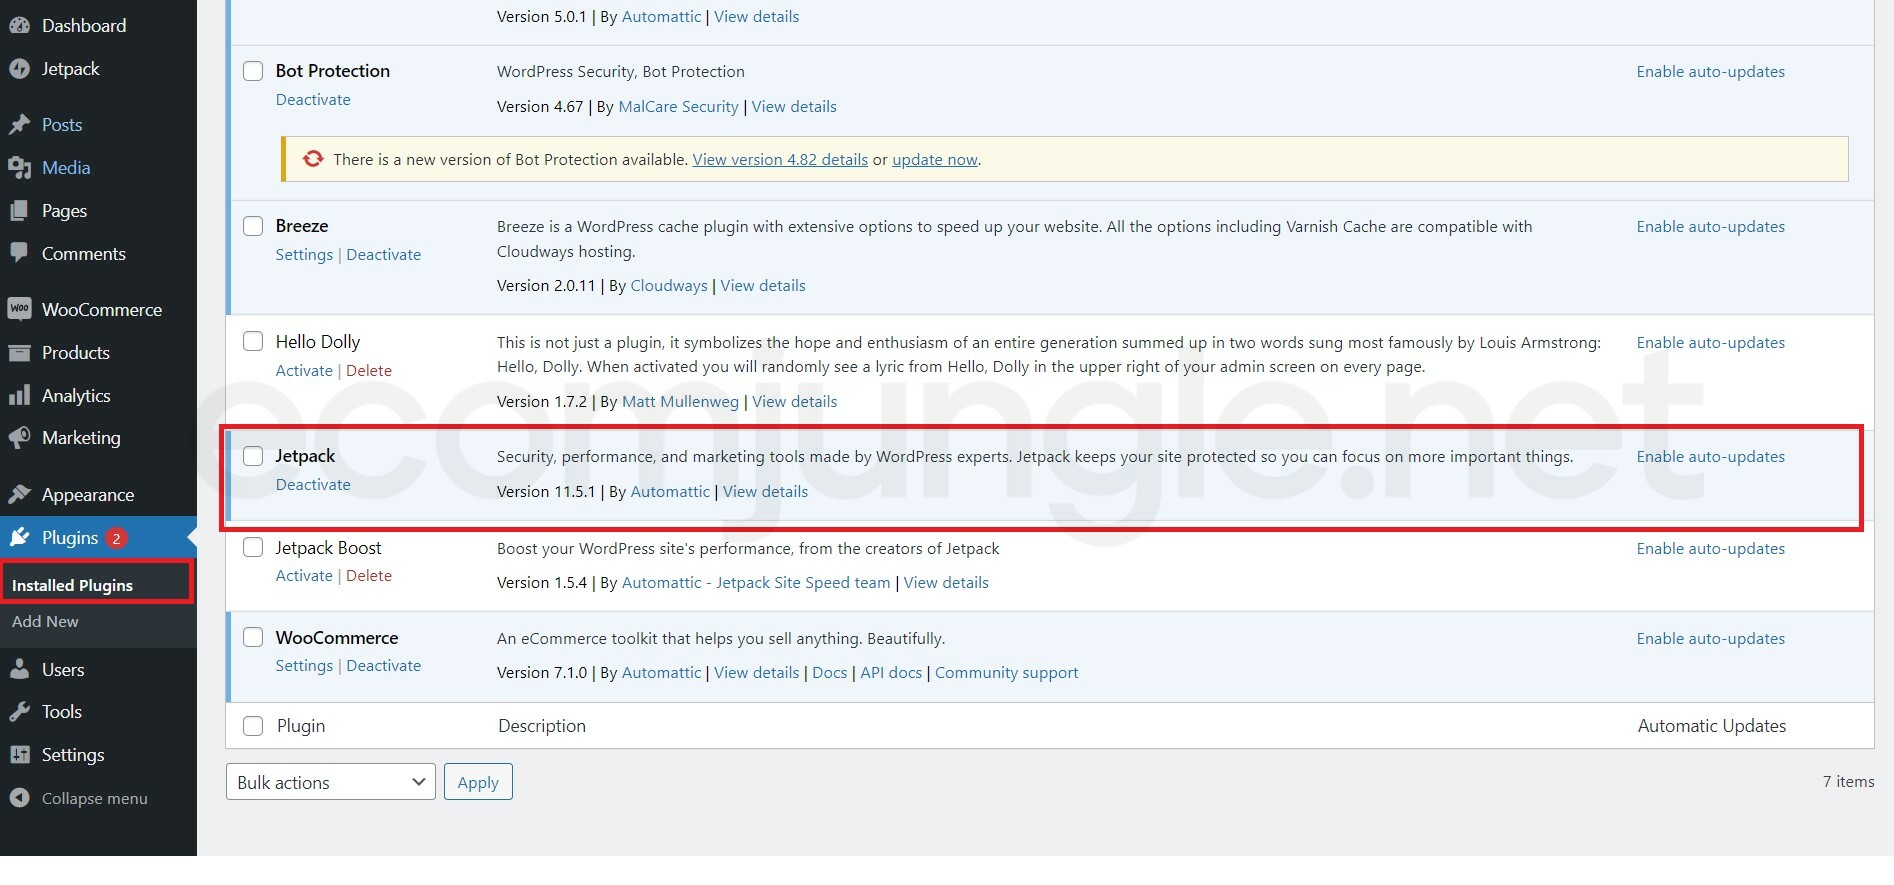
5. Once you’ve installed (and/or activated) a plugin, you will find it in the Installed Plugins section. In our example, we installed and activated Jetpack. Scrolling down on the Installed Plugins page, we find it near the bottom.
6. To further set up a plugin, look for it within the Settings section, or it might get added directly to the admin bar.
How Often Should You Update Your WordPress Plugins? #
You should check for WordPress plugin updates at least once a month. Set a specific day each month to address any plugin updates. You’ll want to manually update them and turn off any automatic updating to protect the integrity of your site. Automatic updates can push plugin updates to your site at unexpected or inopportune times.
Most plugin developers release updates reasonably often. By checking once a month, there may already be a few updates per plugin. If you wait months and months between updates, this number will grow.
If you neglect plugin updates, you can compromise your site’s security and make it vulnerable to hackers. Or the plugin can stop working altogether. A plugin failure could be a major issue if its functionality is essential to your site.
How To Update Your WordPress Plugins #
Once you install a WordPress plugin, it is listed on your Installed Plugins page.

For plugins listed on this page, you can manage the following actions:
- Activate – appears for any plugins that have been installed but not yet activated

- Settings – once a plugin is activated, you can select this option to view the plugin
Settings page to set up the plugin

- Deactivate – used to Deactivate a plugin, so it no longer affects your site

- Update Now – located at the bottom of each entry next to the version details link

- Enable Automatic Updates – we recommend you do not enable automatic updates

- Delete – once a plugin is Deactivated, you can Delete it

1. When it’s time to update a plugin, find it in the list and look for the yellow notification that says, ‘There is a new version of XX available.’

2. Click update now. The yellow notice turns green when the update is complete and reads Updated!

Tip:
If you are ready to update multiple plugins simultaneously, you can select the checkbox for multiple plugins and then click the Bulk actions dropdown menu and select Update. Then click Apply.

How To Remove Or Deactivate WordPress Plugins? #
When it’s time to remove or deactivate a WordPress plugin, it’s super simple. Just find the plugin you want to deactivate from the list of Installed Plugins. Click Deactivate. The page will reload, replacing the Deactivate button with a Delete button. Click Delete.


Tip:
Activated plugins appear in blue, while deactivated plugins have a white backdrop.
How Many Plugins Are Too Many? #
You can install as many plugins as you want without affecting your site performance. But once you start activating them, there might be a problem. Too many plugins can slow your site down. You should try only to activate essential plugins that you actively implement in your site’s functionality, design, or management.
Try to keep your activated plugins under 20 whenever possible. When you’re just starting, it’s better to keep it under ten, so you can effectively manage the plugins without bogging down your site.
What’s Next? #
Now that you’ve learned how to install a WordPress plugin, you’re ready to create your first WordPress backup. The following tutorial will cover how to back up your WordPress site and restore it if something goes wrong. It’s essential to keep an updated backup available in case something you install or changes you make break your site.
Frequently Asked Questions #
In most cases, you cannot use WordPress plugins for free WordPress.com sites. You will need a self-hosted WordPress site (like the one we’re setting up!) to benefit from plugins.
You should never assume that a plugin is safe. Even though the WordPress team has manually reviewed each plugin on the directory, this doesn’t mean the plugin is coded well or won’t negatively interact with other plugins. Poorly coded plugins can pose a major security risk because hackers can target these plugins to find a backdoor to your site. That’s why it’s crucial to implement some best practices when choosing WordPress plugins.
Some of the most popular WordPress plugins are HubSpot, WooCommerce, Yoast SEO, Jetpack, Elementor, and WPForms. These plugins have risen to prominence because they have great features and functionality that users love. To install a plugin from this list, head to your admin sidebar and select Add New.
If you need to manually install a WordPress plugin that is a ZIP file, you can do this via the FTP method. FTP clients let you upload and manage files on your server. You’ll first extract the ZIP file on your computer and then upload it to your FTP server within the wp-content > plugins folder. Then you can log in to your WordPress dashboard and Activate the plugin!


